When setting up a project, there are various steps that lead to the final product and its success. With a project management method, such as Scrum, there is an emphasis on clear communication between the Product Owner, the Scrum Master and the developers. There are always various changes made to the project documentation and its specifications, this means that we constantly need to ensure requirements are validated by stakeholders before the development process, and later on if modifications are made. Whether on Data Center or Cloud, here are our few tips and solutions to master requirement approval in Confluence.
Table of contents:
Approving requirements in Confluence Data Center
(See next Chapter for Confluence Cloud)
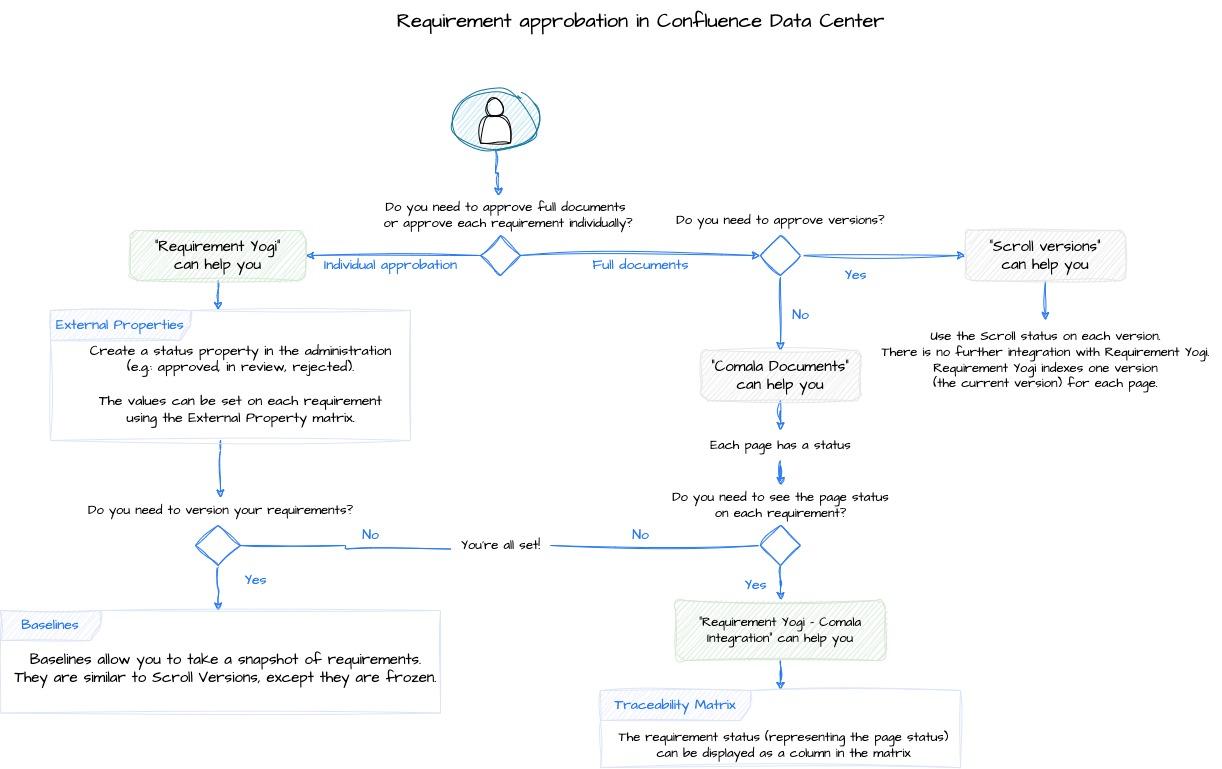
First, we will focus more on Data Center users. For requirement approval in Confluence, you can use 3 plug-ins and combine them for more benefits. You can see below a quick overview on requirement approval in Confluence Data Center.
How do I approve various pages with Comala Document Manager?
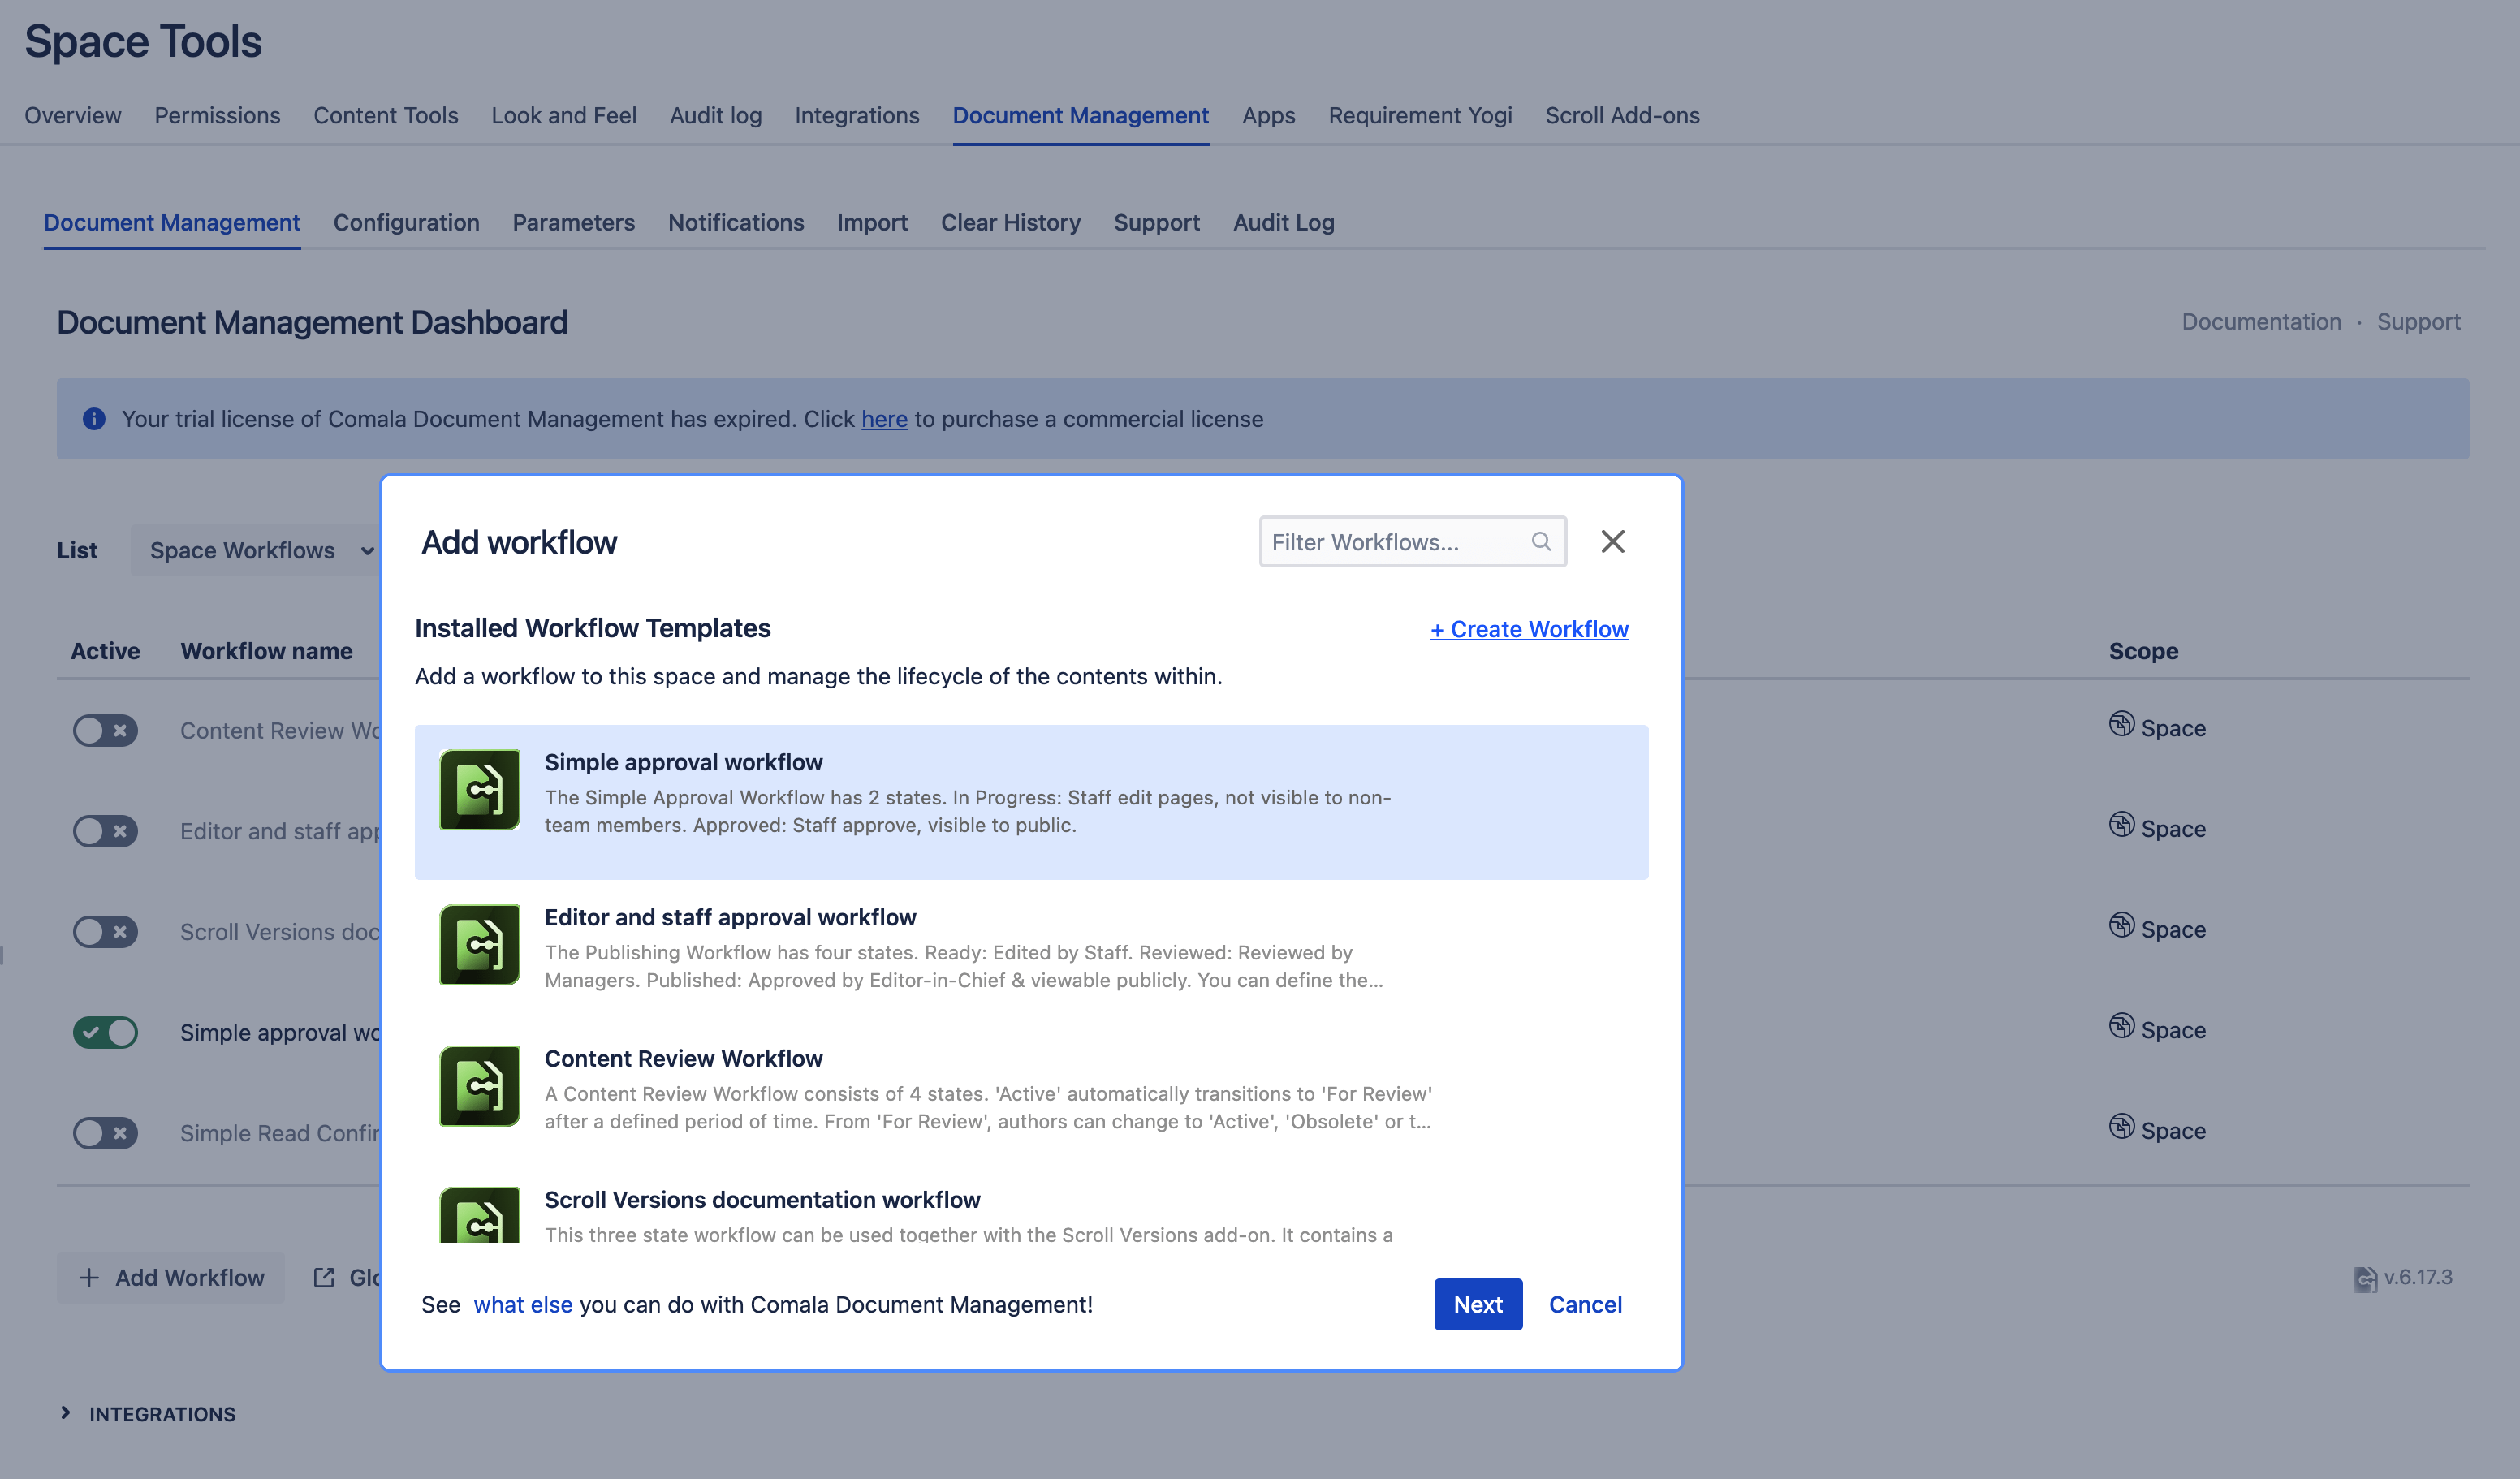
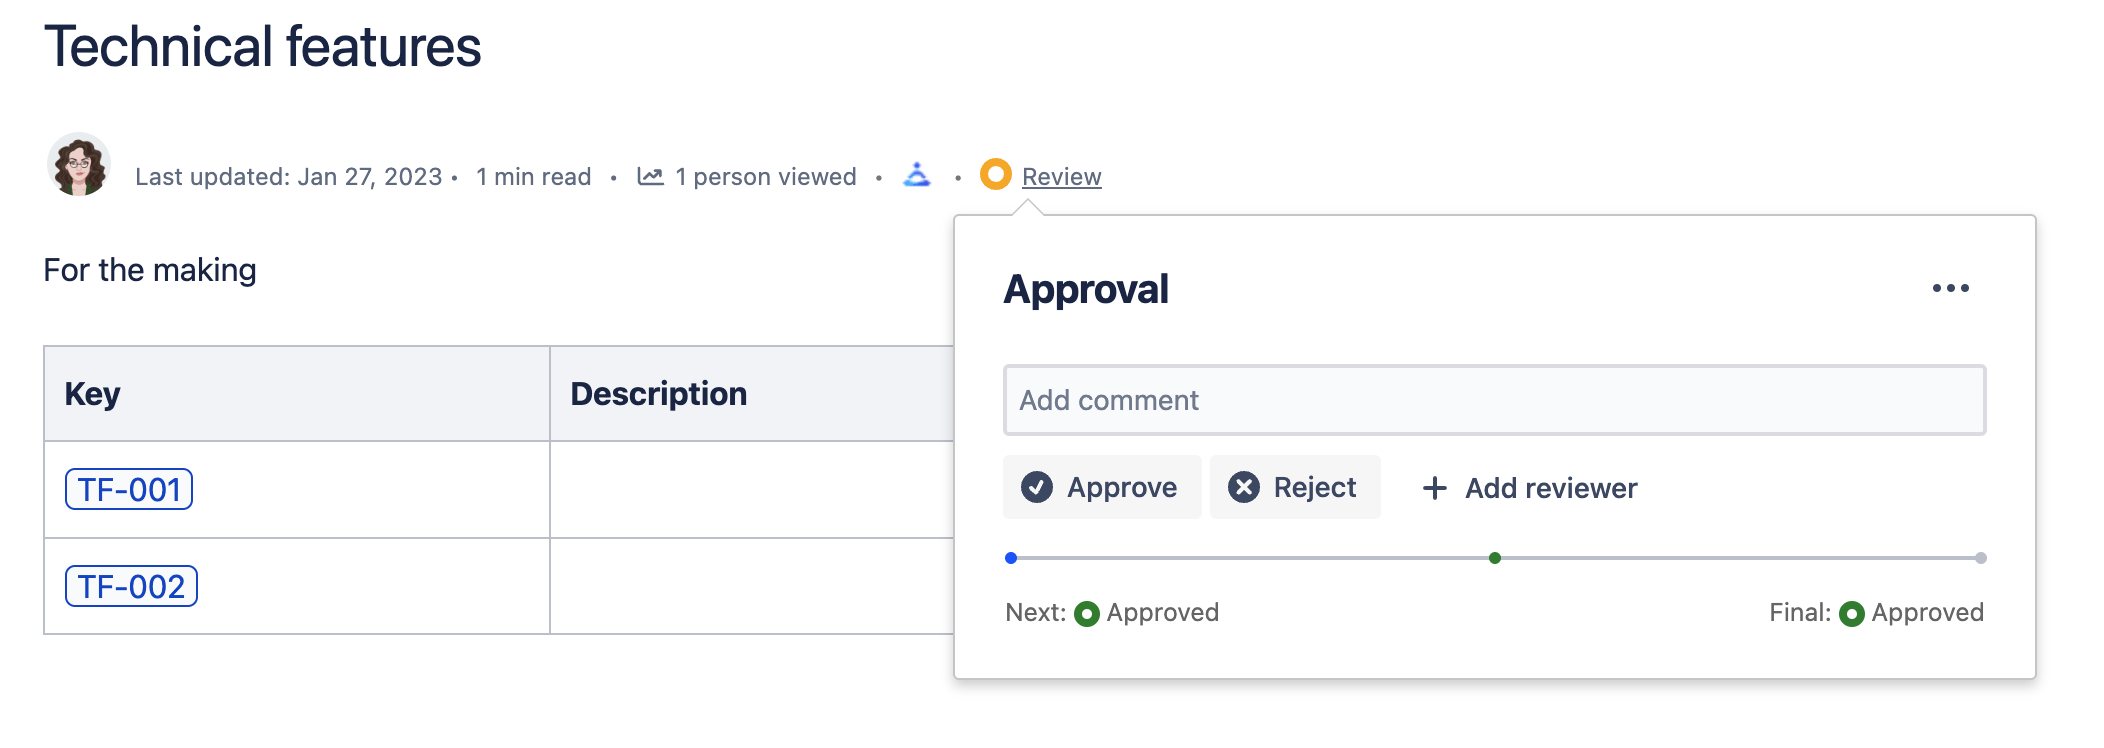
The Comala Documents plug-in allows you to add a workflow to one page or to the whole space, then review and approve each page
- Simple approval workflow
- Editor and staff approval workflow
- Content review workflow
- Scroll versions documentation workflow
- Simple read confirmation
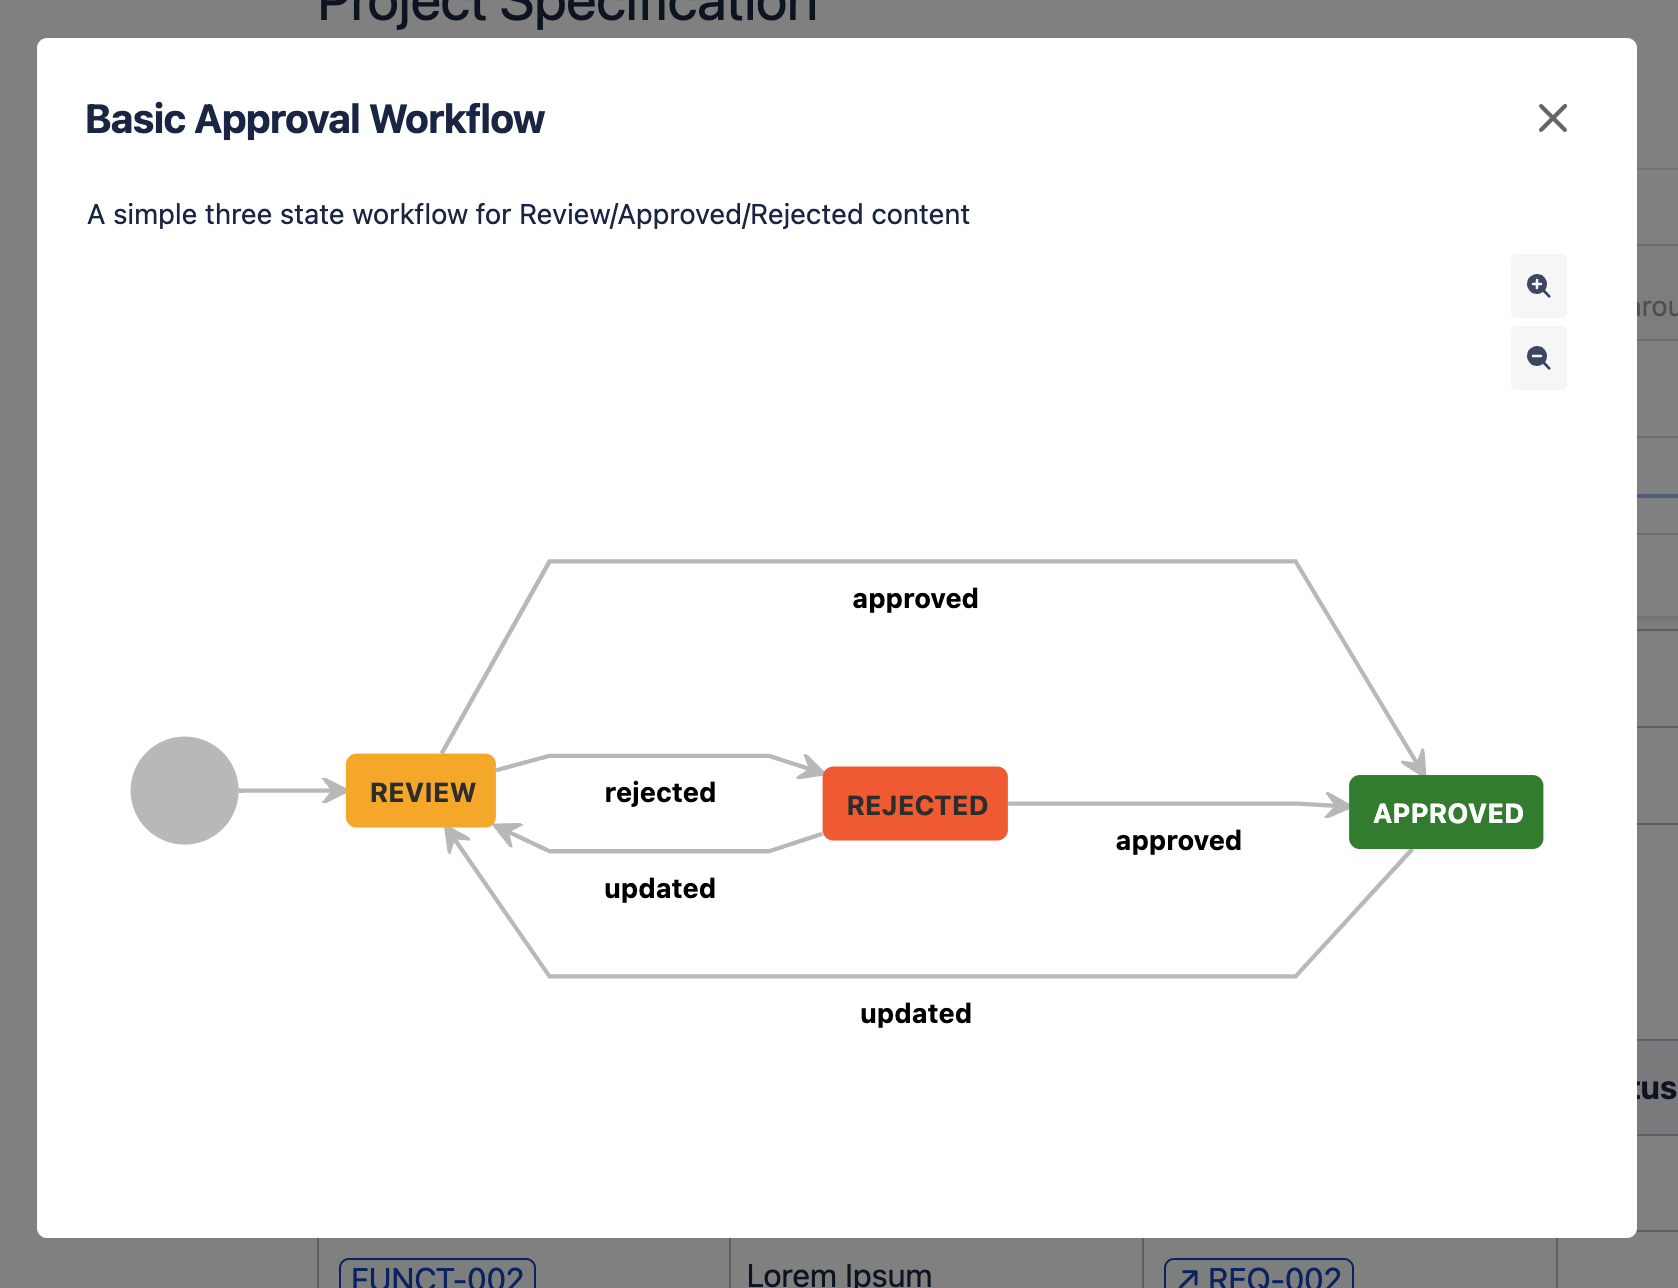
You can edit these workflows as you need, and even create your own workflows. Here is an example:
If you use this simple tool as standalone, you can only approve the whole page. Thus, each time you modify it, everything has to be reviewed again just for a small change. How can this be reflected in the Requirement Yogi popup?
Approve each requirement using Requirement Yogi – Comala Integration
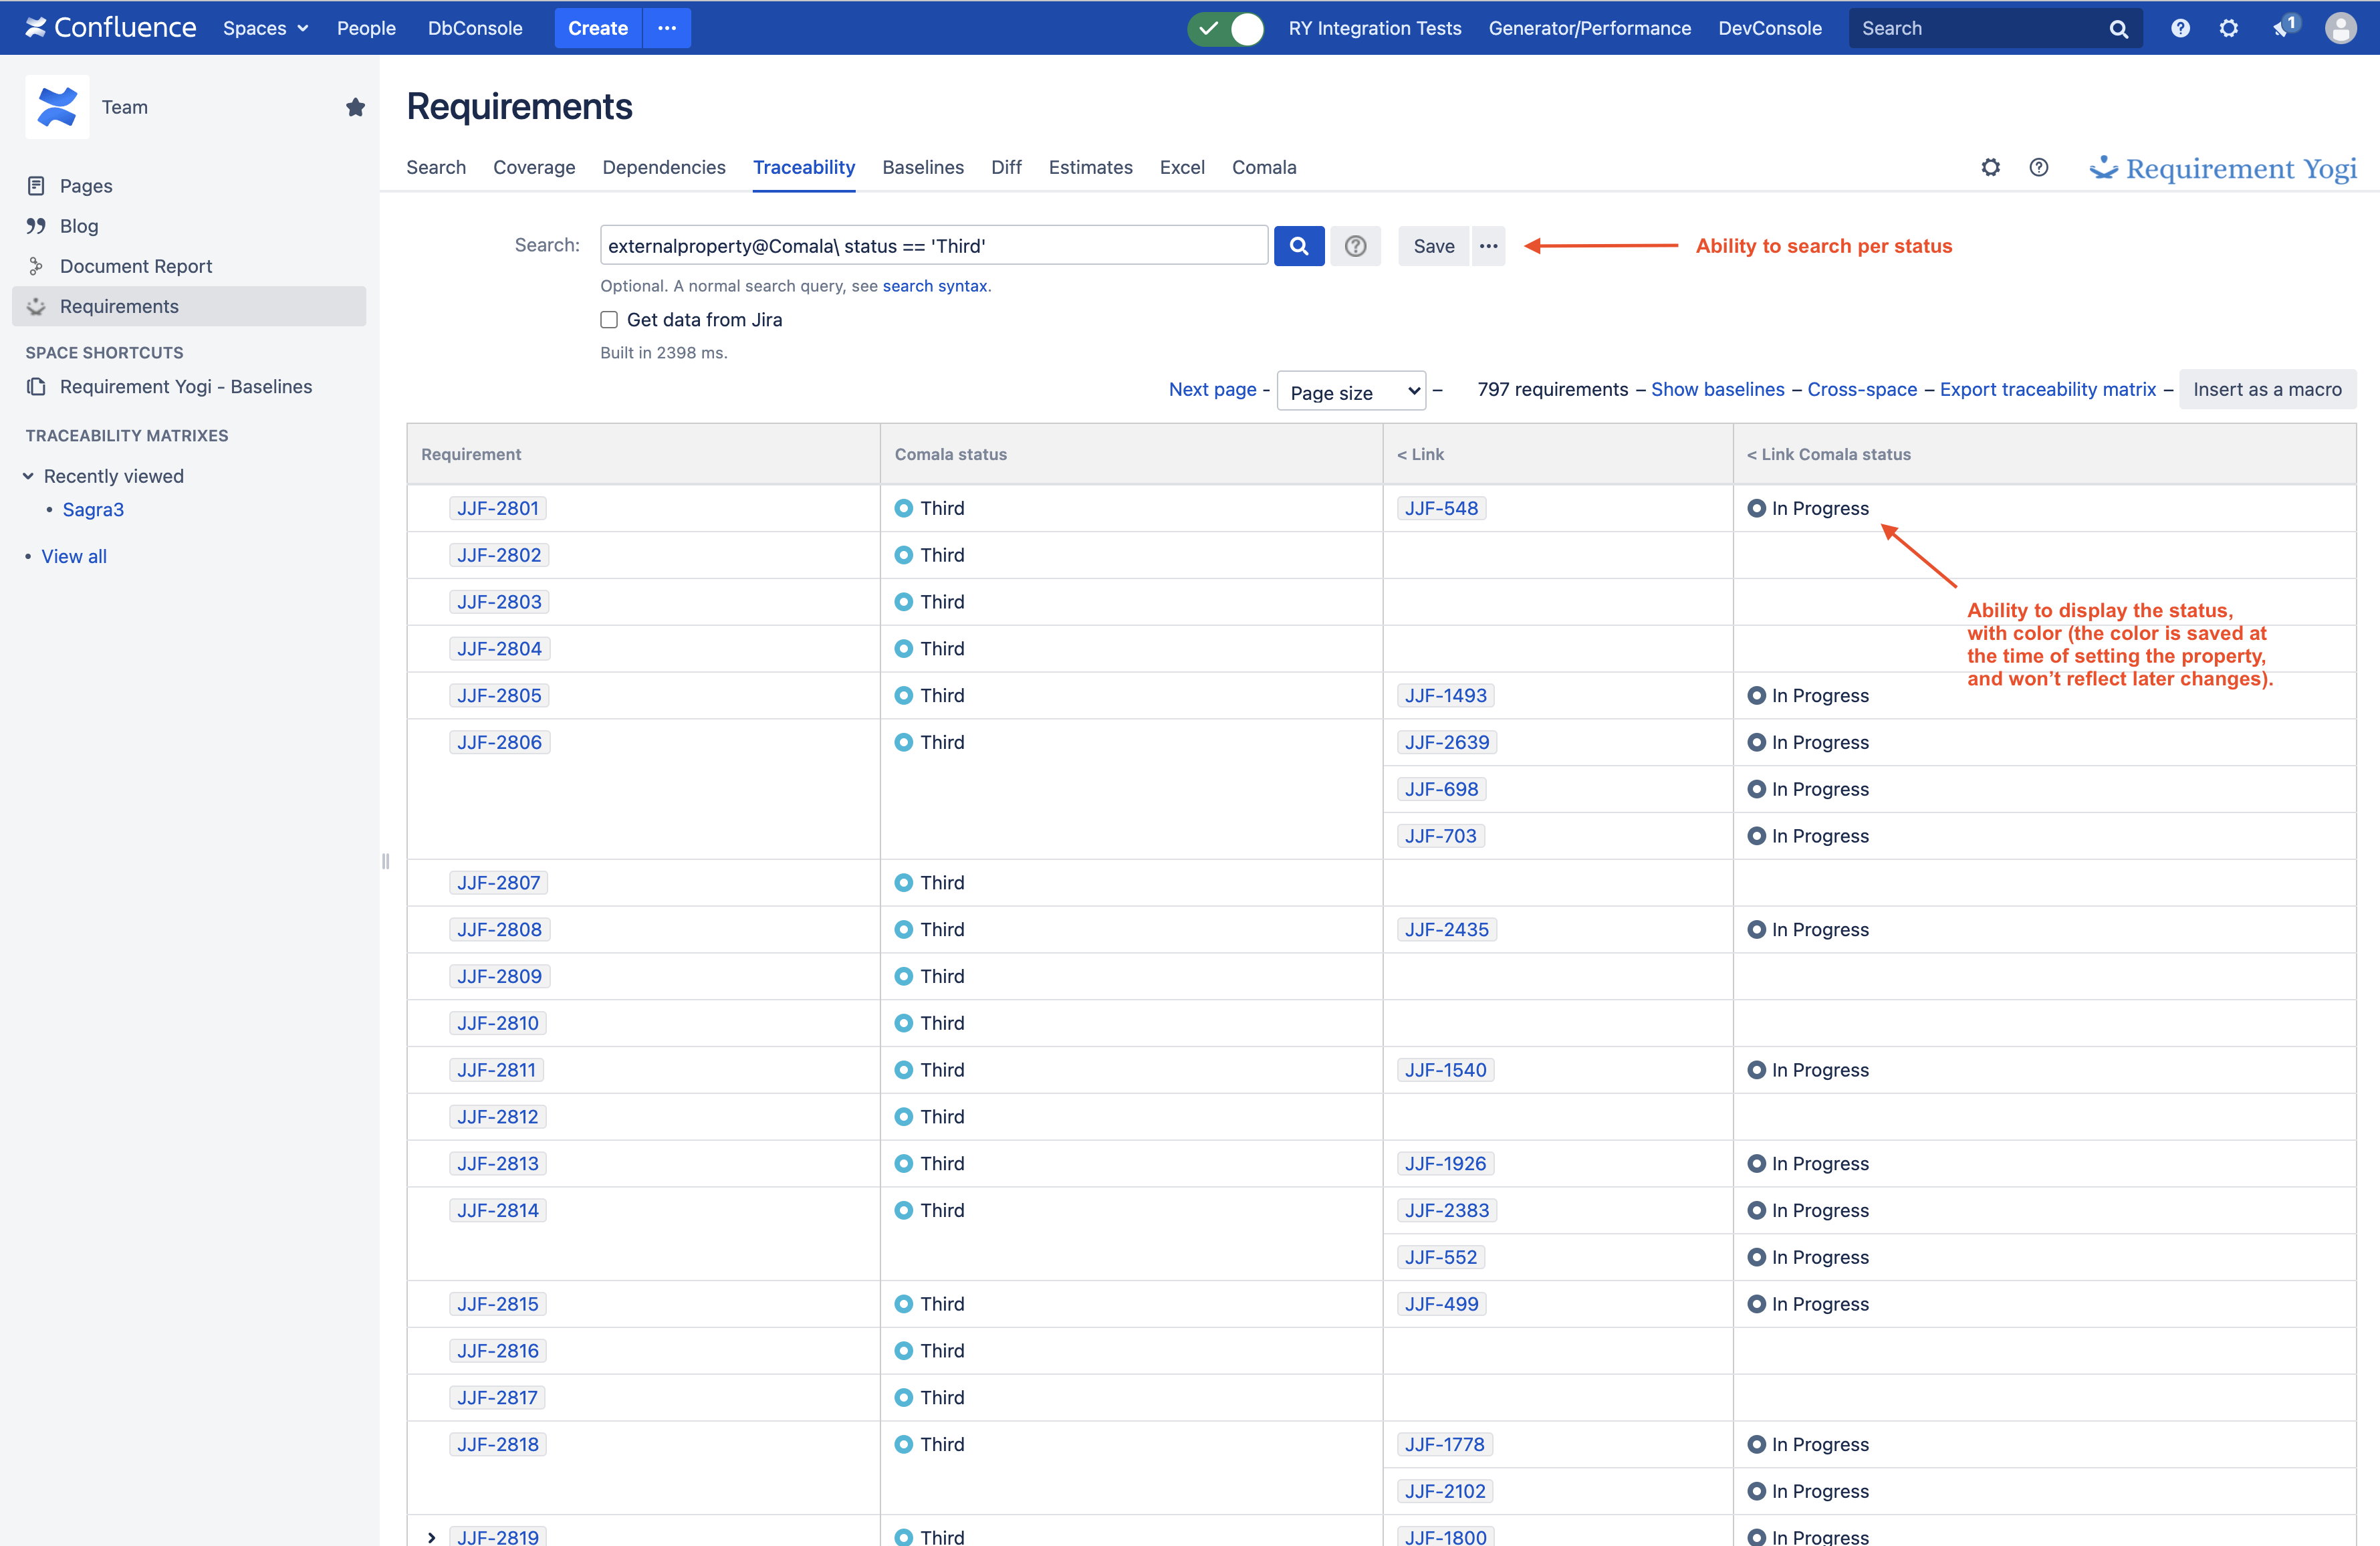
The plug-in Requirement Yogi allows you to write and track requirements in Confluence. The RY-Comala Integration can add the Comala property on all the requirements of the page. The status of the page will be linked to the requirements and be visible in the requirement pop-up. You can also track it back in the Traceability Matrix.
This solution is perfect for customers who approve whole pages of requirements. As a bonus, when one edits the page, Comala is able to revert the status of the page to “In progress”, which really helps tracking the status of requirements.
Use Requirement Yogi without Comala
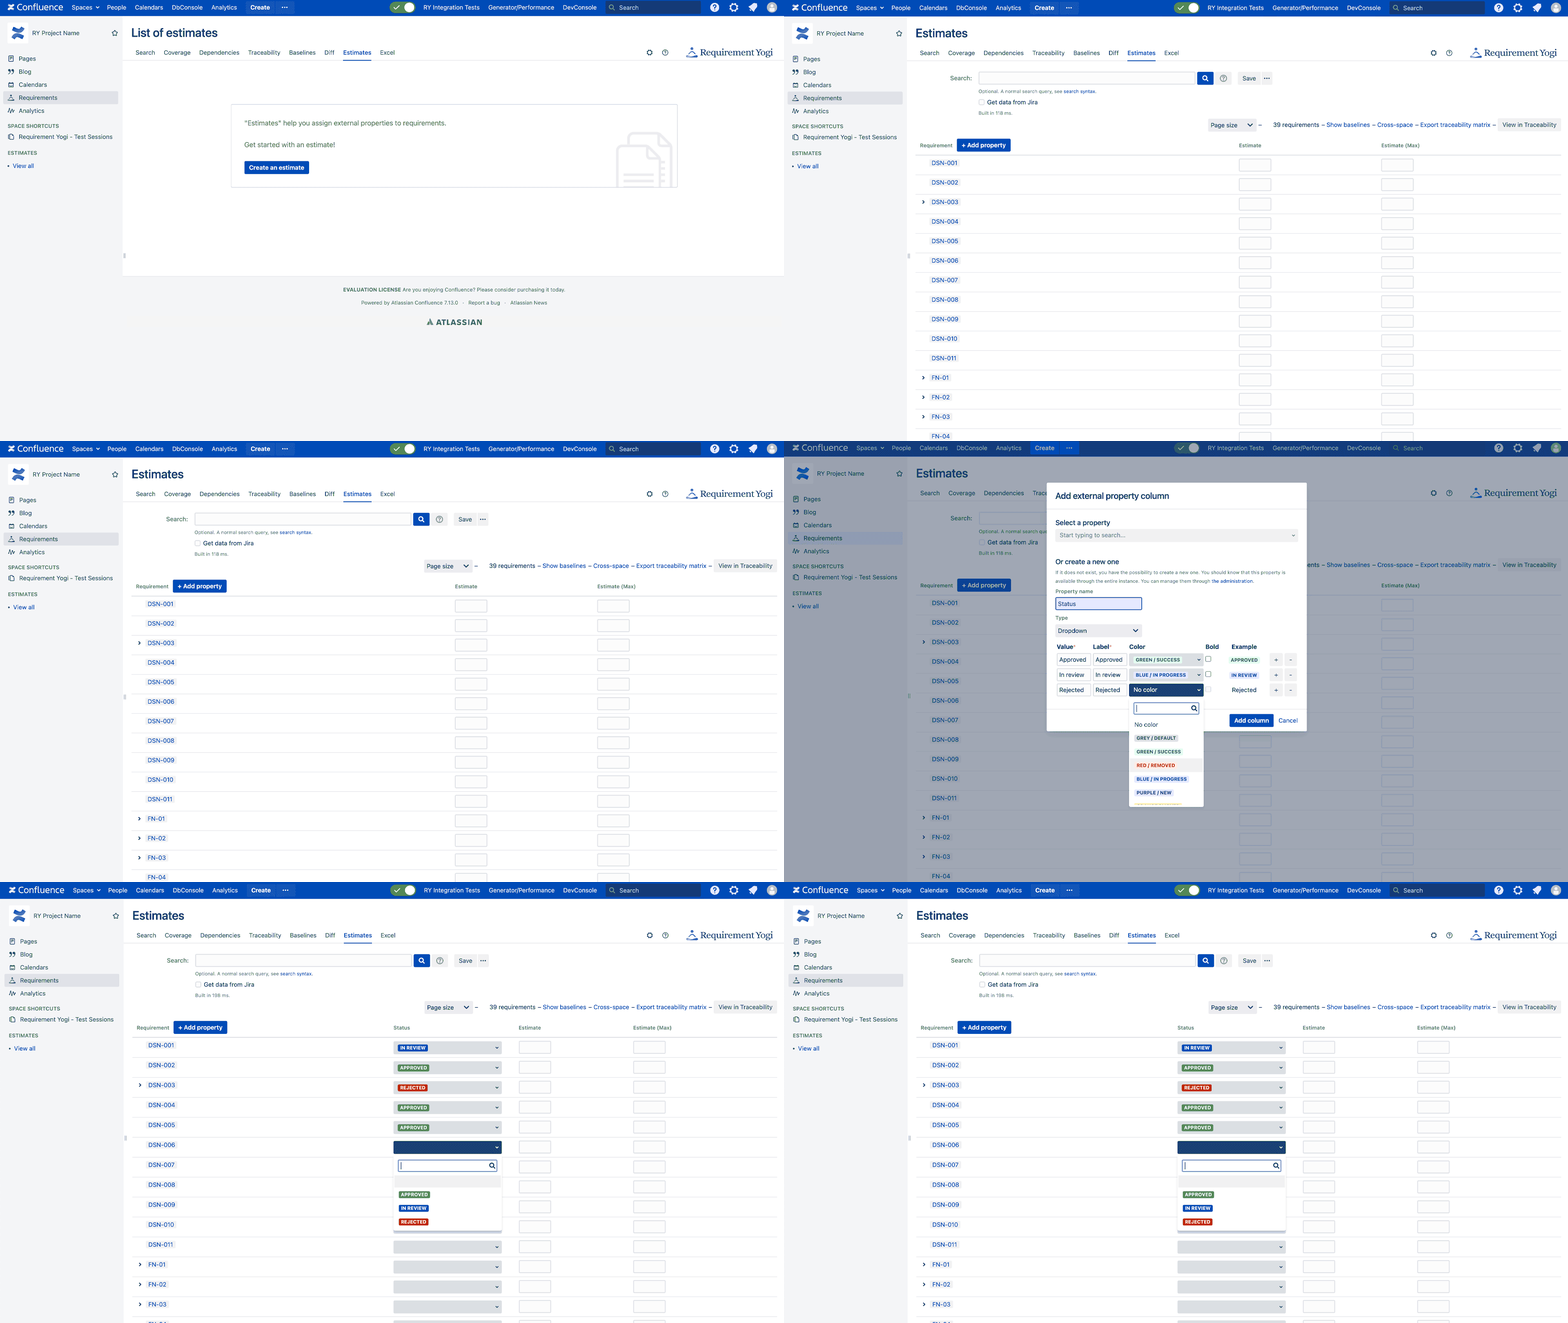
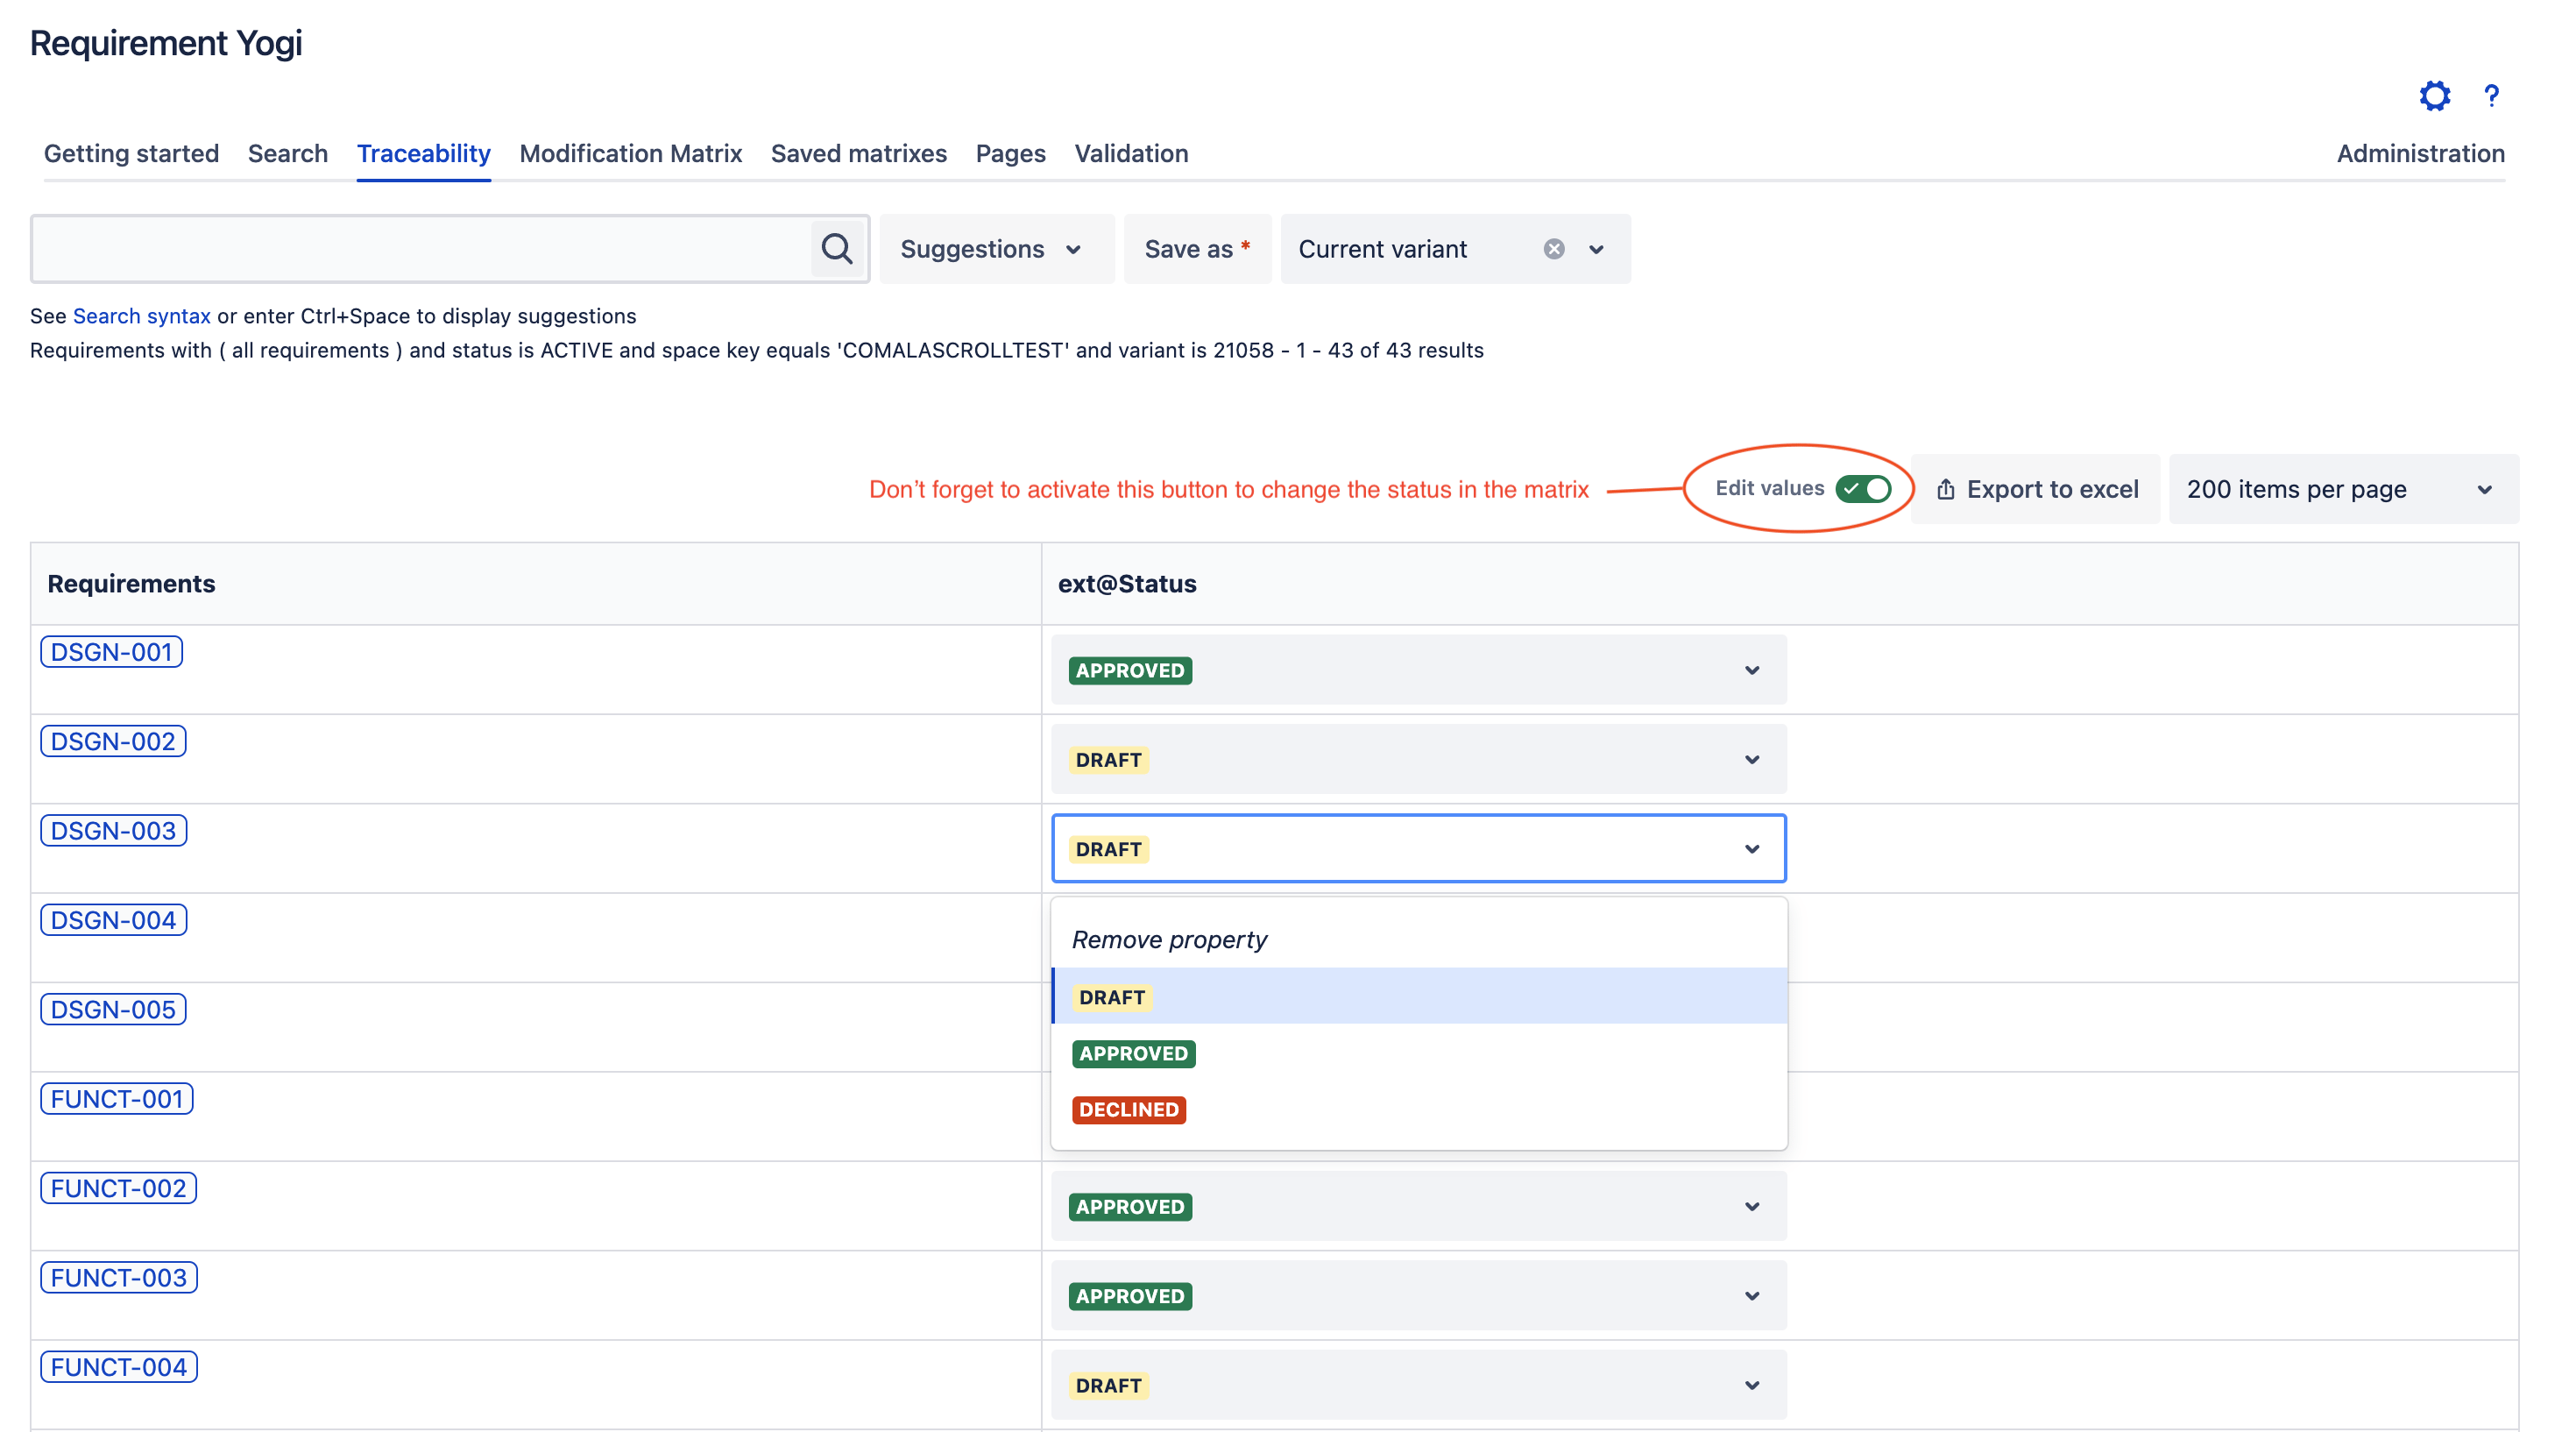
As Comala Documents works for entire pages, when you are in editing mode, you cannot do individual approbation. For that, you need to add an external property, manually. You can write your own properties and add any status name you want. You can edit quickly edit each requirement status just by typing the first name of it, “A” for approved, etc.
To sum up, this is a quick method to set up. However, we don’t save the history or the author of changes on external properties. Every editor of the space has permissions, and all transitions are allowed, as opposed to a true workflow.
How to make versions and variants of a page using Scroll Versions?
First, what is Scroll versions ? It is a plug-in which allows the creation of versions of a page and even a space, versions allow you to:
- Share documentation with stakeholders while working on additional changes in private,
- Track changes on documents throughout the document lifecycle, including archiving or freezing a certain state
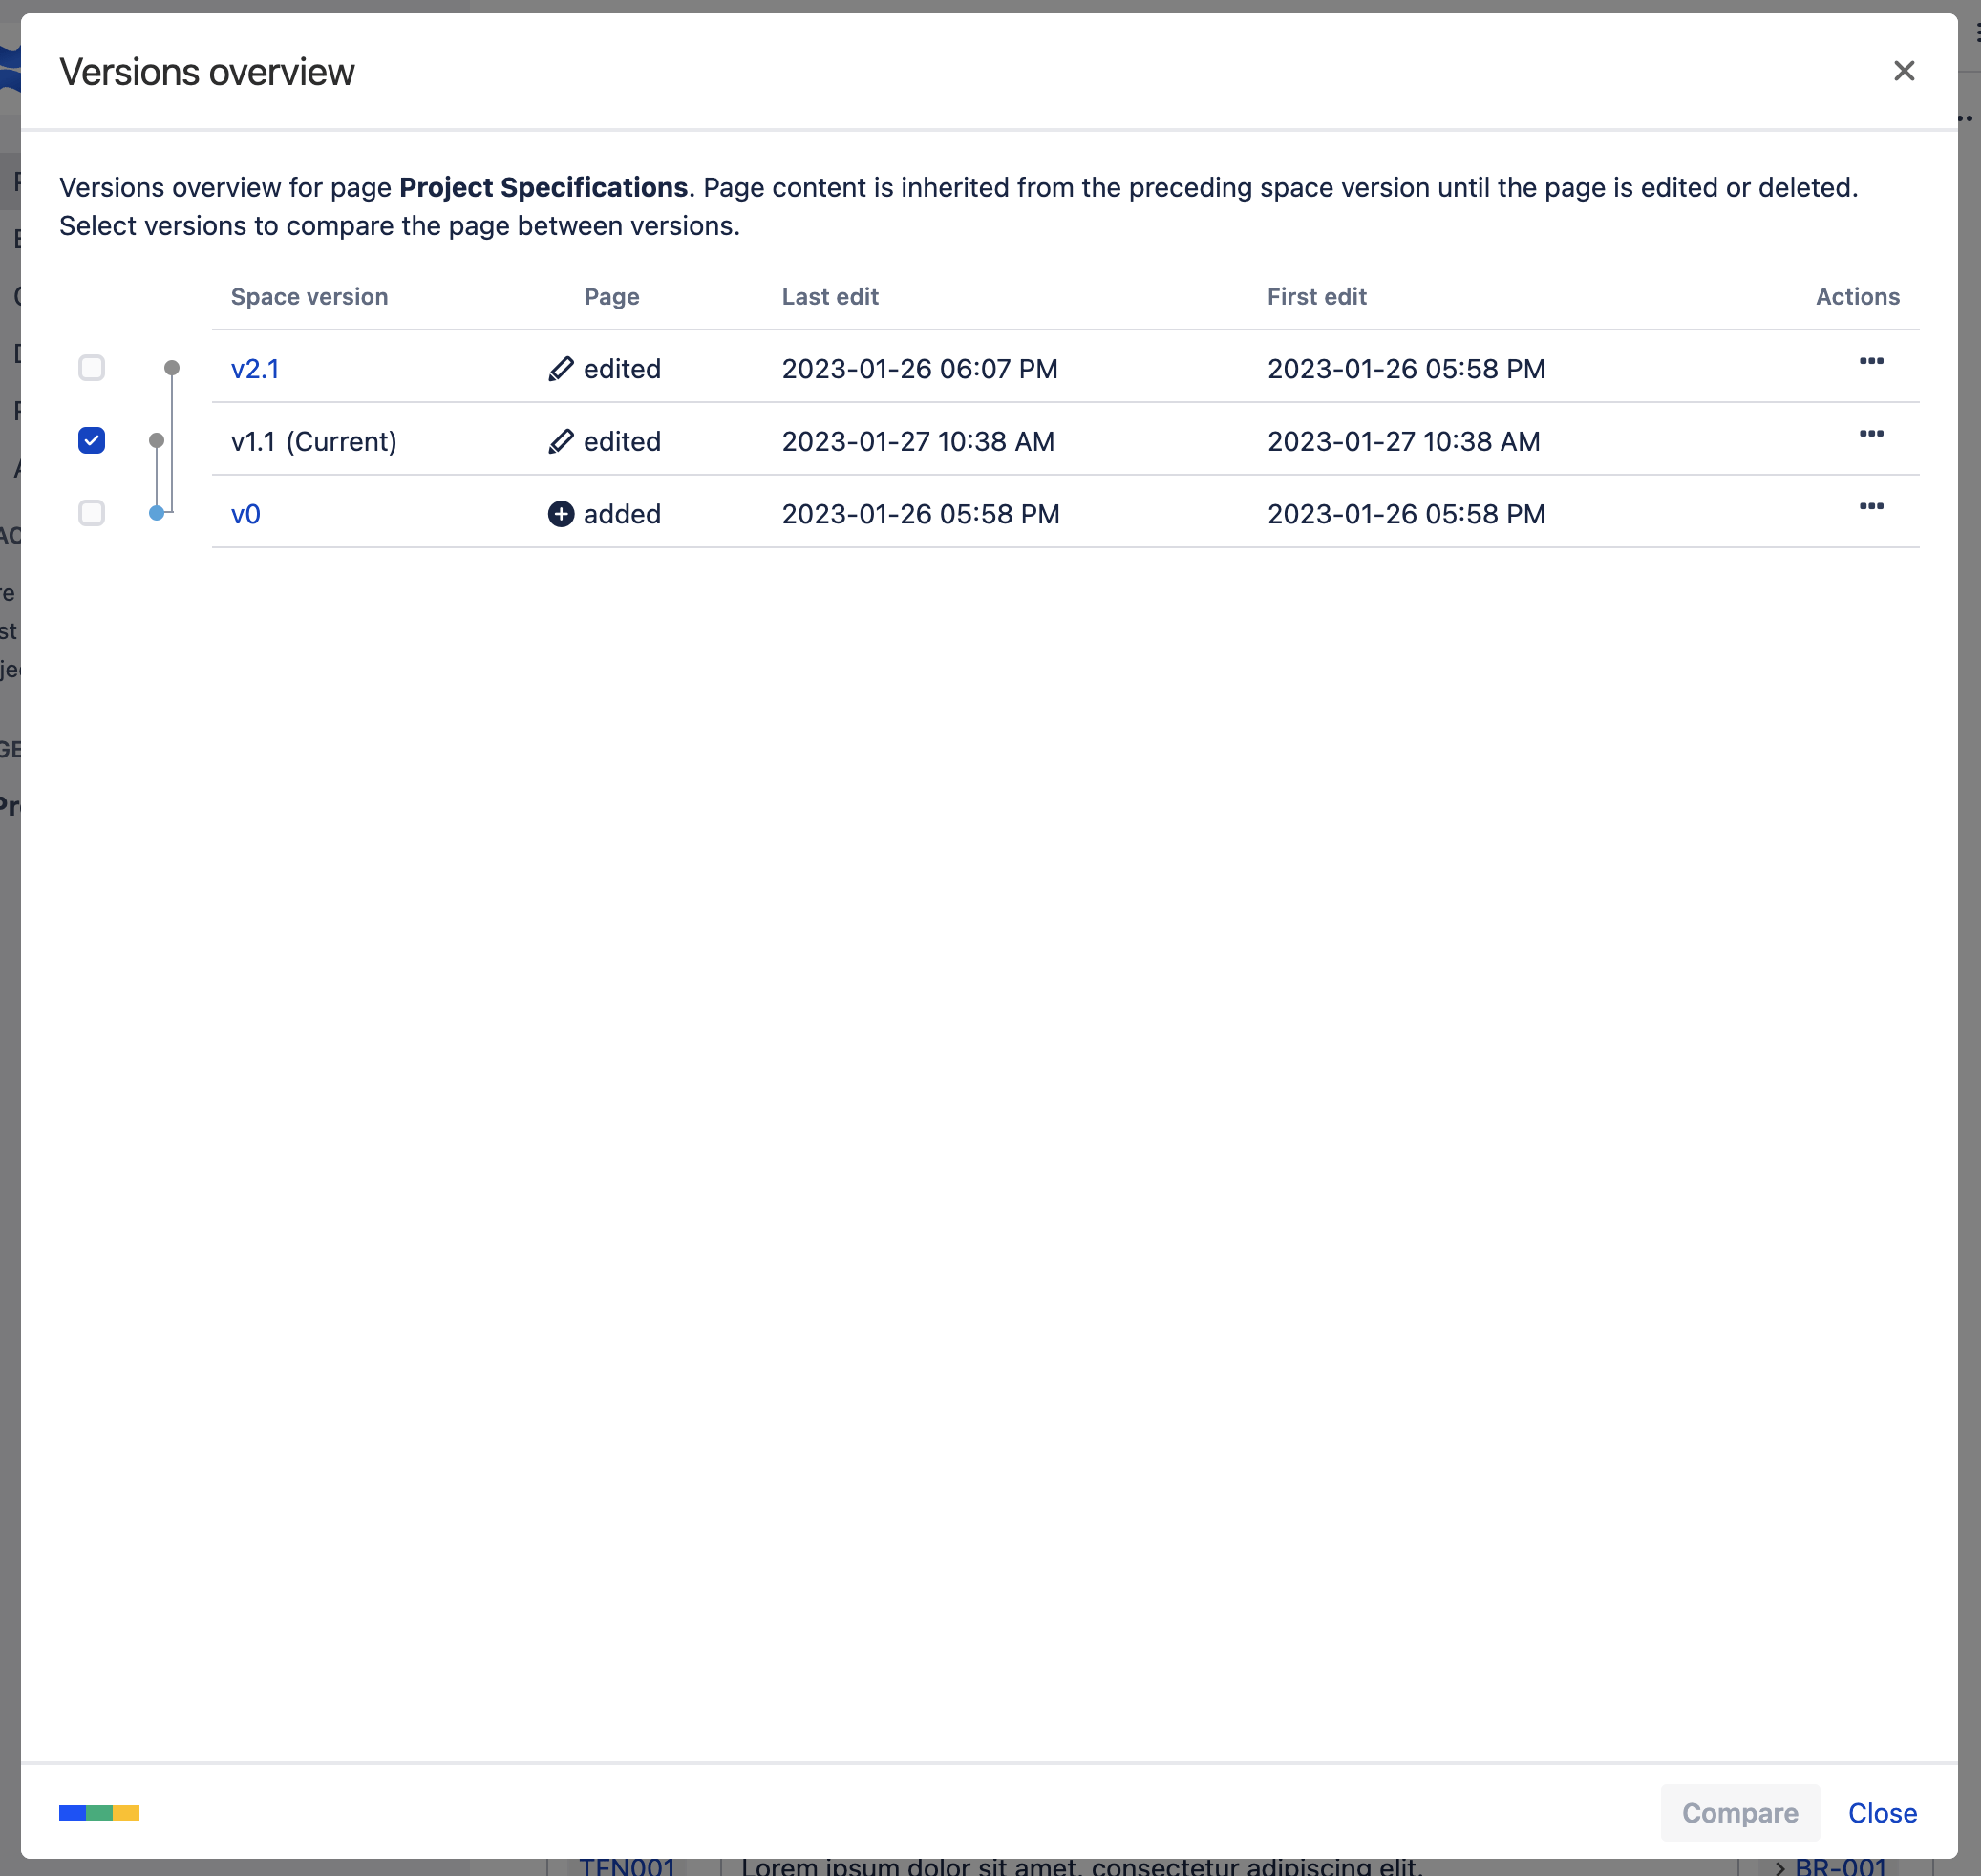
This means that you can section your work in branches and merge pages when they are reviewed and approved. You can easily compare versions of pages by clicking on the Versions button on the top right of your page. Scroll Versions also have a Variants feature, where you can create conditional content.
There is no specific integration at this time between Requirement Yogi and Scroll Versions in the Data Center model, but we’ve worked so that Requirement Yogi only indexes the main Scroll Versions page. You can tell them appart quickly when you look at the url or the name of a page, versions will have a dot:”.” at the beginning, the main page doesn’t.
Thanks to this basic integration, you can prepare requirements in Scroll Versions, then only have those requirement be indexed once you move the page as the current version.
Requirement approval in Confluence Cloud
(See above for Confluence Data Center)
Confluence Cloud has been developing quickly and has now more and more customers. We are always working on adding new features to have a complete plug-in, as close to Data Center as it can be.
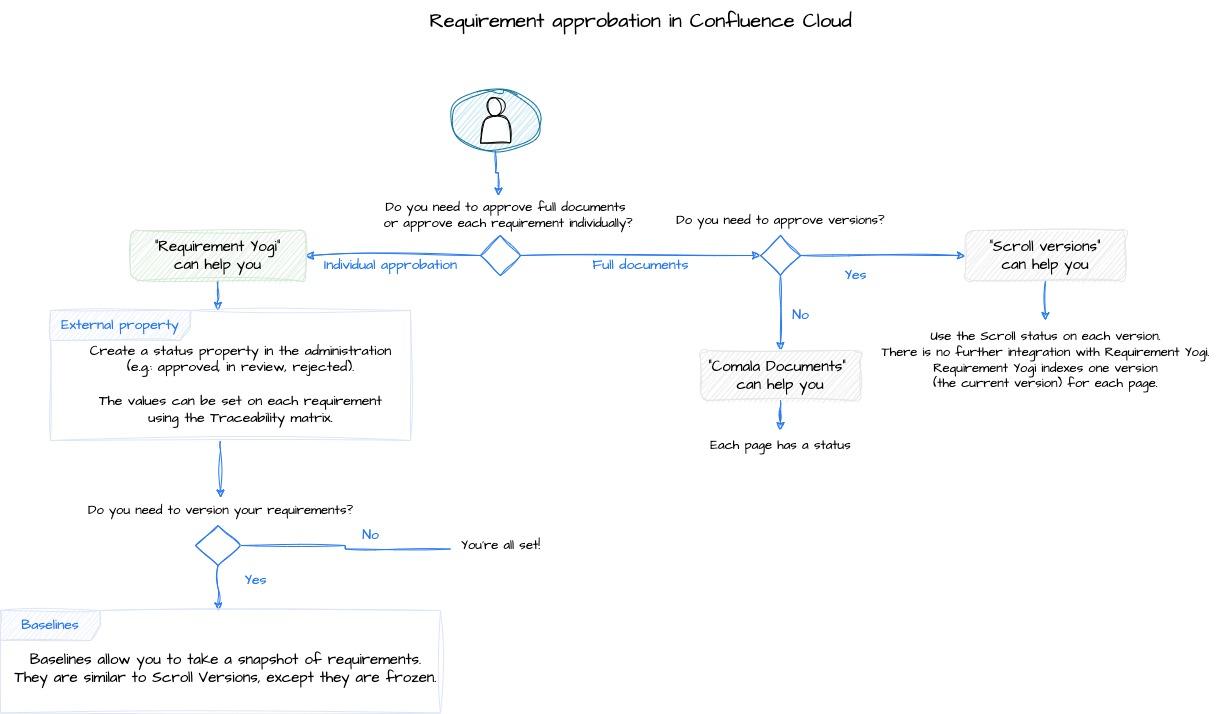
You can see below a quick overview on requirement approval in Confluence Cloud.
Comala Document Manager to approve my documents on Cloud
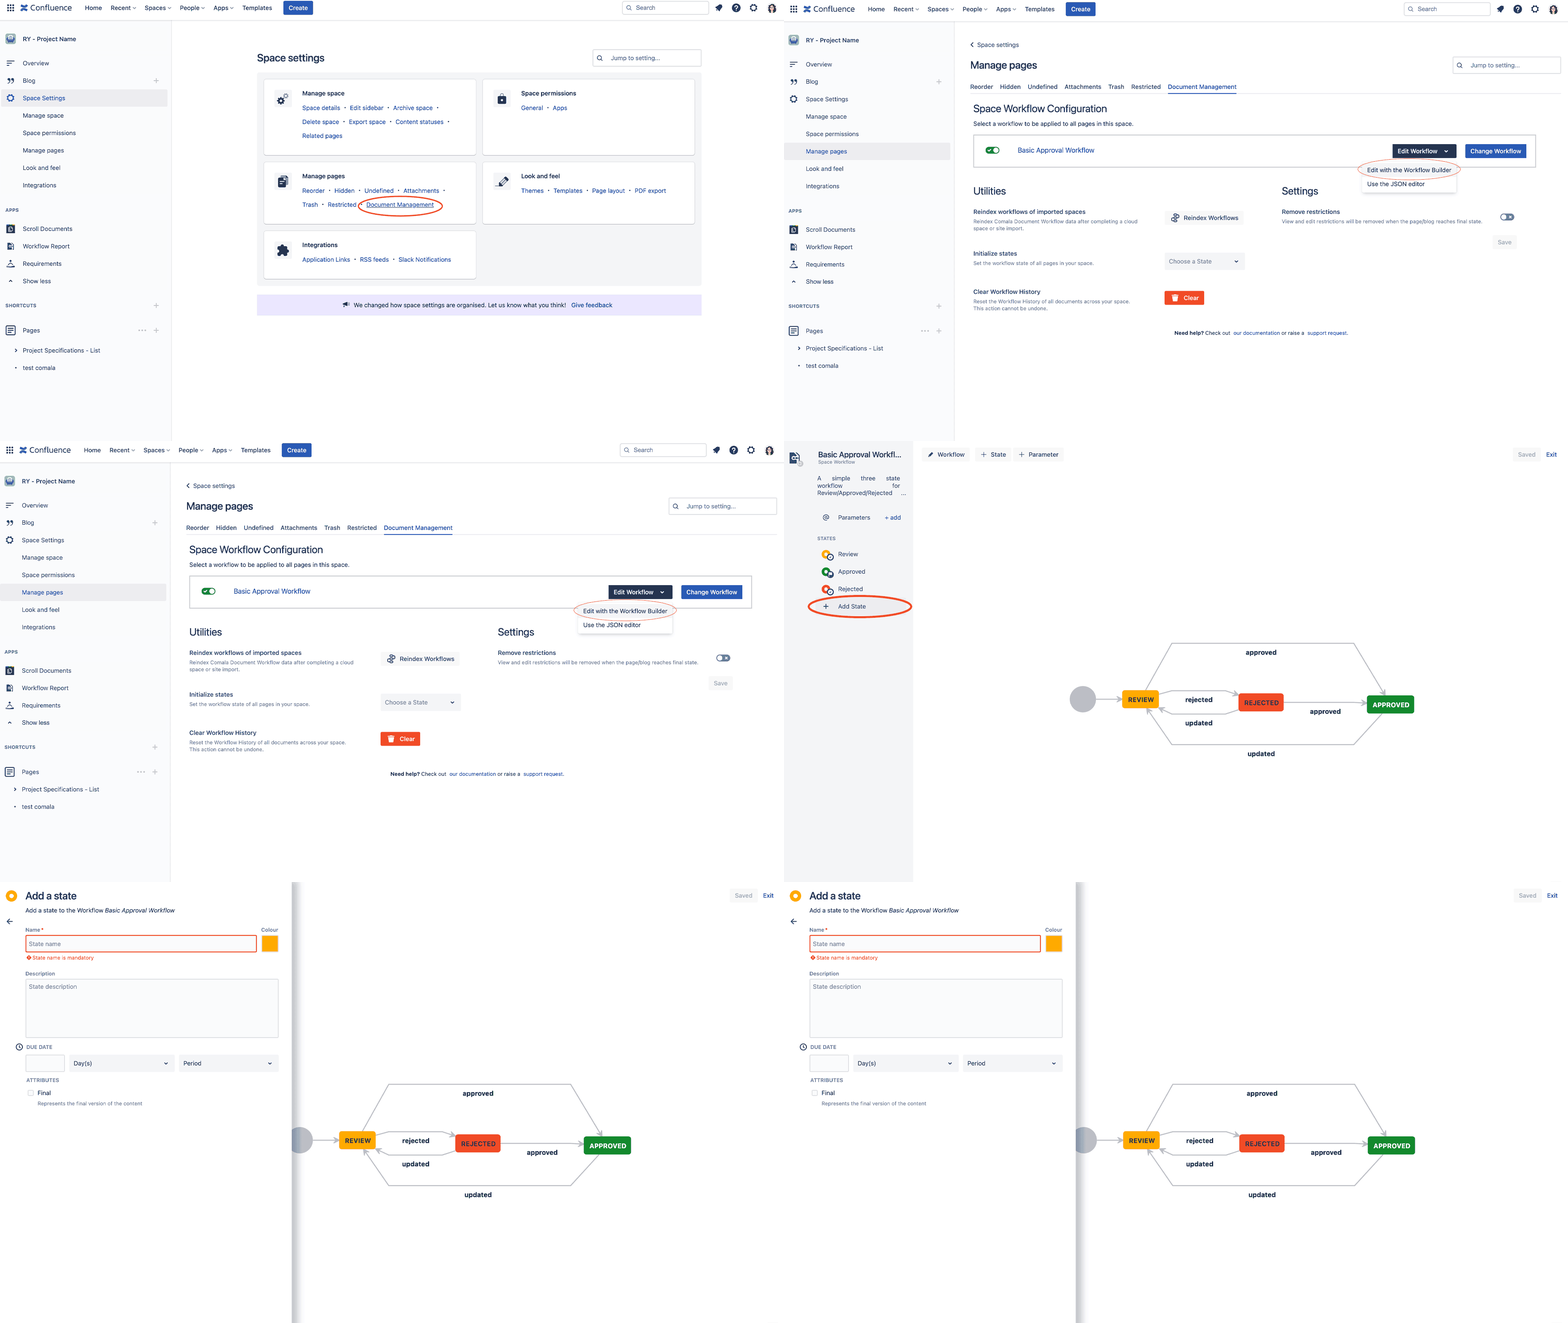
Same as on Data Center, you can add a workflow to a page or the whole space just as easily as in Data Center, at first there are fewer workflows available but you can easily take a basic approval workflow and edit it. In the space settings, document management, you can edit workflows, and other utilities.
On the top of the page, where you can change the status of the page, you can also have access to the version of the page that was approved or rejected before the one you are actually working on. If you go in the Workflow Report, you can see the states of all the pages in your space, with the name of the one who reviewed it.
Requirement Yogi to manage and approve each requirements
External Properties
Since it is difficult for plug-ins to communicate together on the Cloud, Requirement Yogi isn’t able to pick up the Comala status of the page. If this is important to you, then you can use a “Status” external property in Requirement Yogi, like on Data Center. As opposed to Comala Documents, this will allow you to track the validation of each requirement.
To use this property, go to the traceability matrix of Requirement Yogi, open the menu of the requirements column and select External Properties → Status. It will add a column with the value as read-only. Then, you can use the toggle on the top-right of the screen to edit the values. You can administer properties in the settings and create new properties in the same style, such as “Test result” or “Approval”, and enter the states yourself.
As usual with external properties, the limitations are:
- There are no specific permissions – Anyone who can edit the space can edit the value of the property,
- All transitions are allowed – Since this is only a “status” field and not a workflow, it is possible to set any status at any time,
- There is no history on external properties (for the moment).
Confluence Status macro
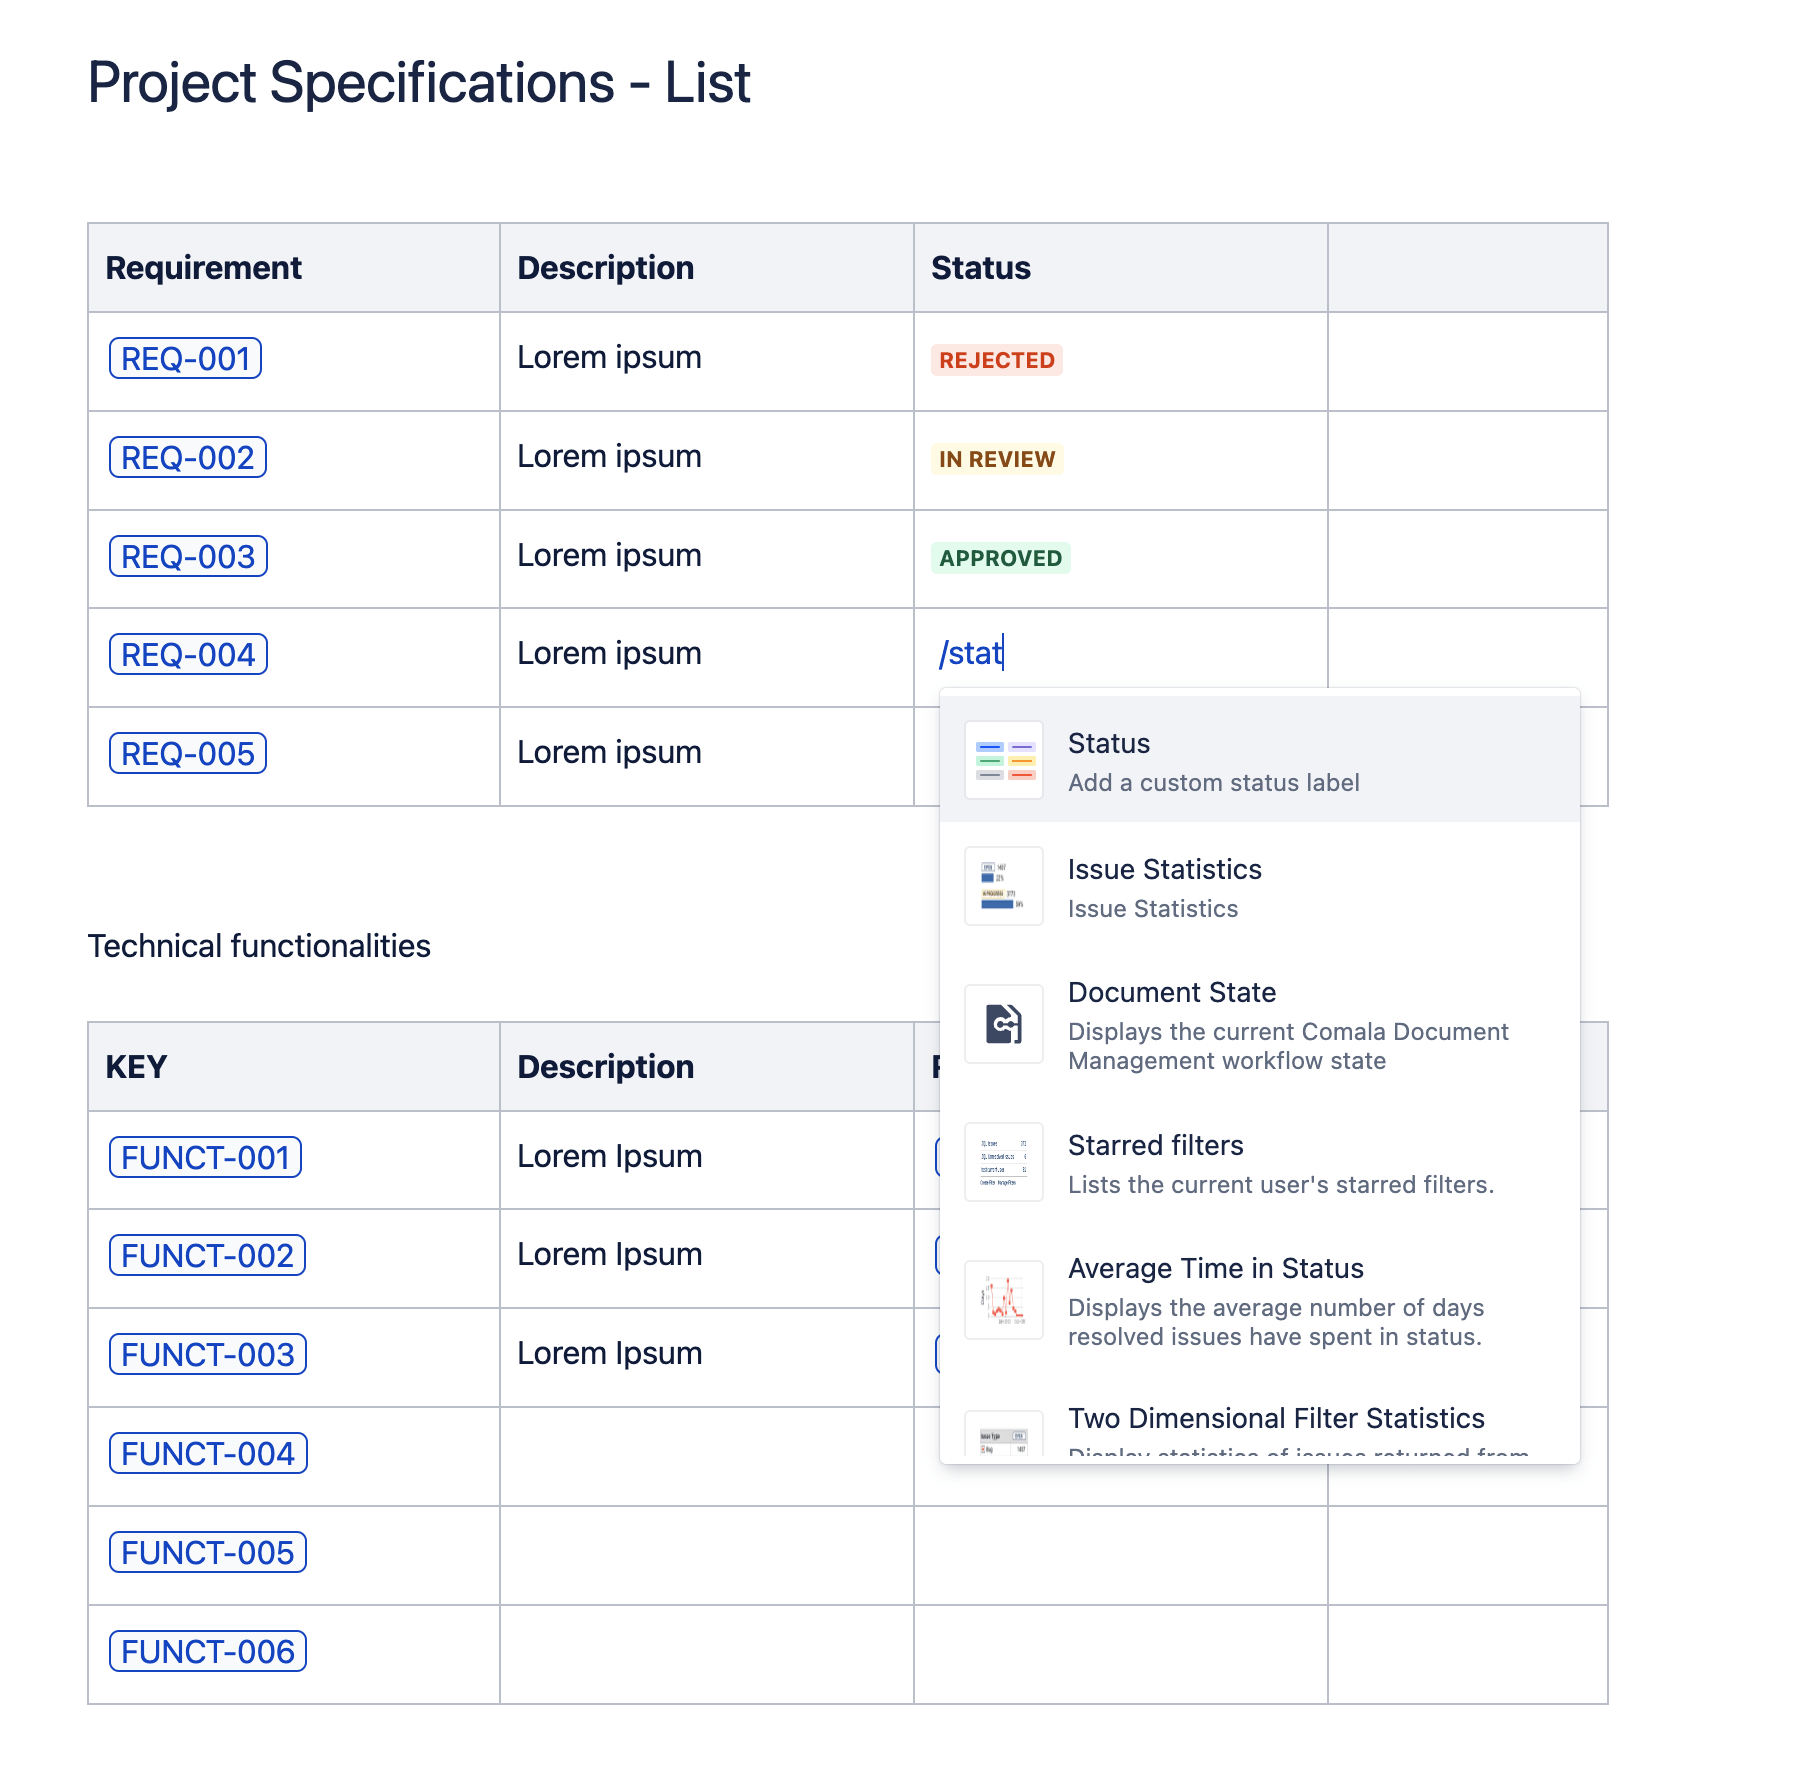
Alternatively, you can manage the status as an inline property, the “Status” can be a column of the original page. The upside is that changes will be tracked, editors will be notified, page permissions are applied and it will be possible to track the history of the page. To insert Confluence’s built-in status macro, type “/status” in the editor:
If you use the last method, as in creating a property status and their macro, you can use the Variants Functionality that allows you to create different versions of pages and then see the changes in the Traceability Matrix. Learn more about Variants in Requirement Yogi here.
The deepest integration with variants so far is to use Scroll Documents to manage versions of pages.
Scroll Documents to manage versions of pages
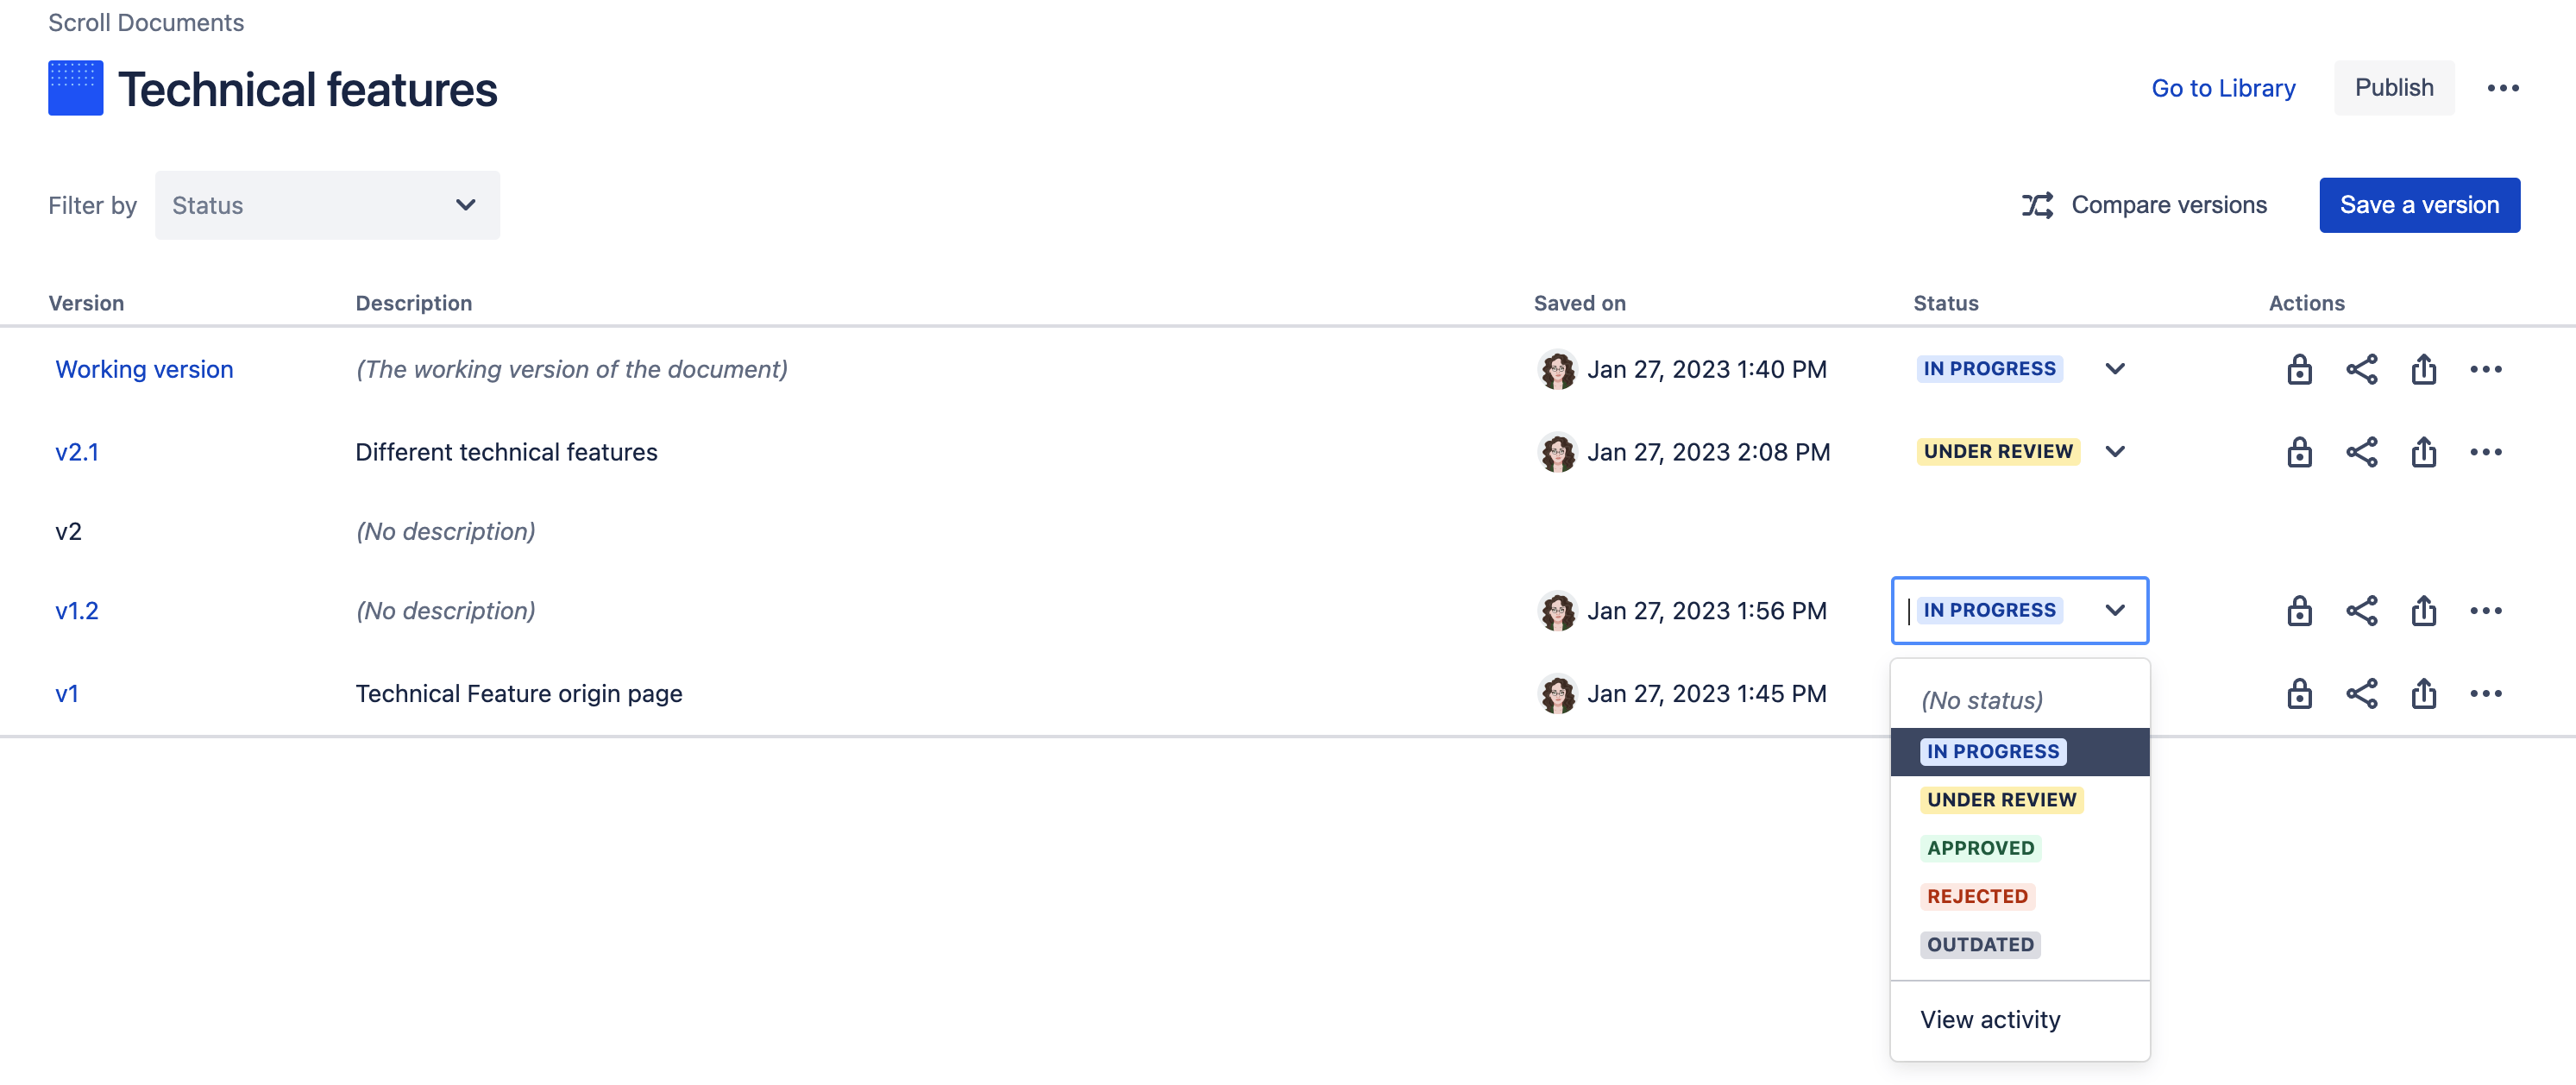
Another way to seek stakeholder approval is to use Scroll Documents. Working with this plug-in will allow you to have several variants for the same page, and set an approval status on each variant. It is not as powerful as having a status on each requirement, but it helps you track which versions was approved, and the differences between versions.
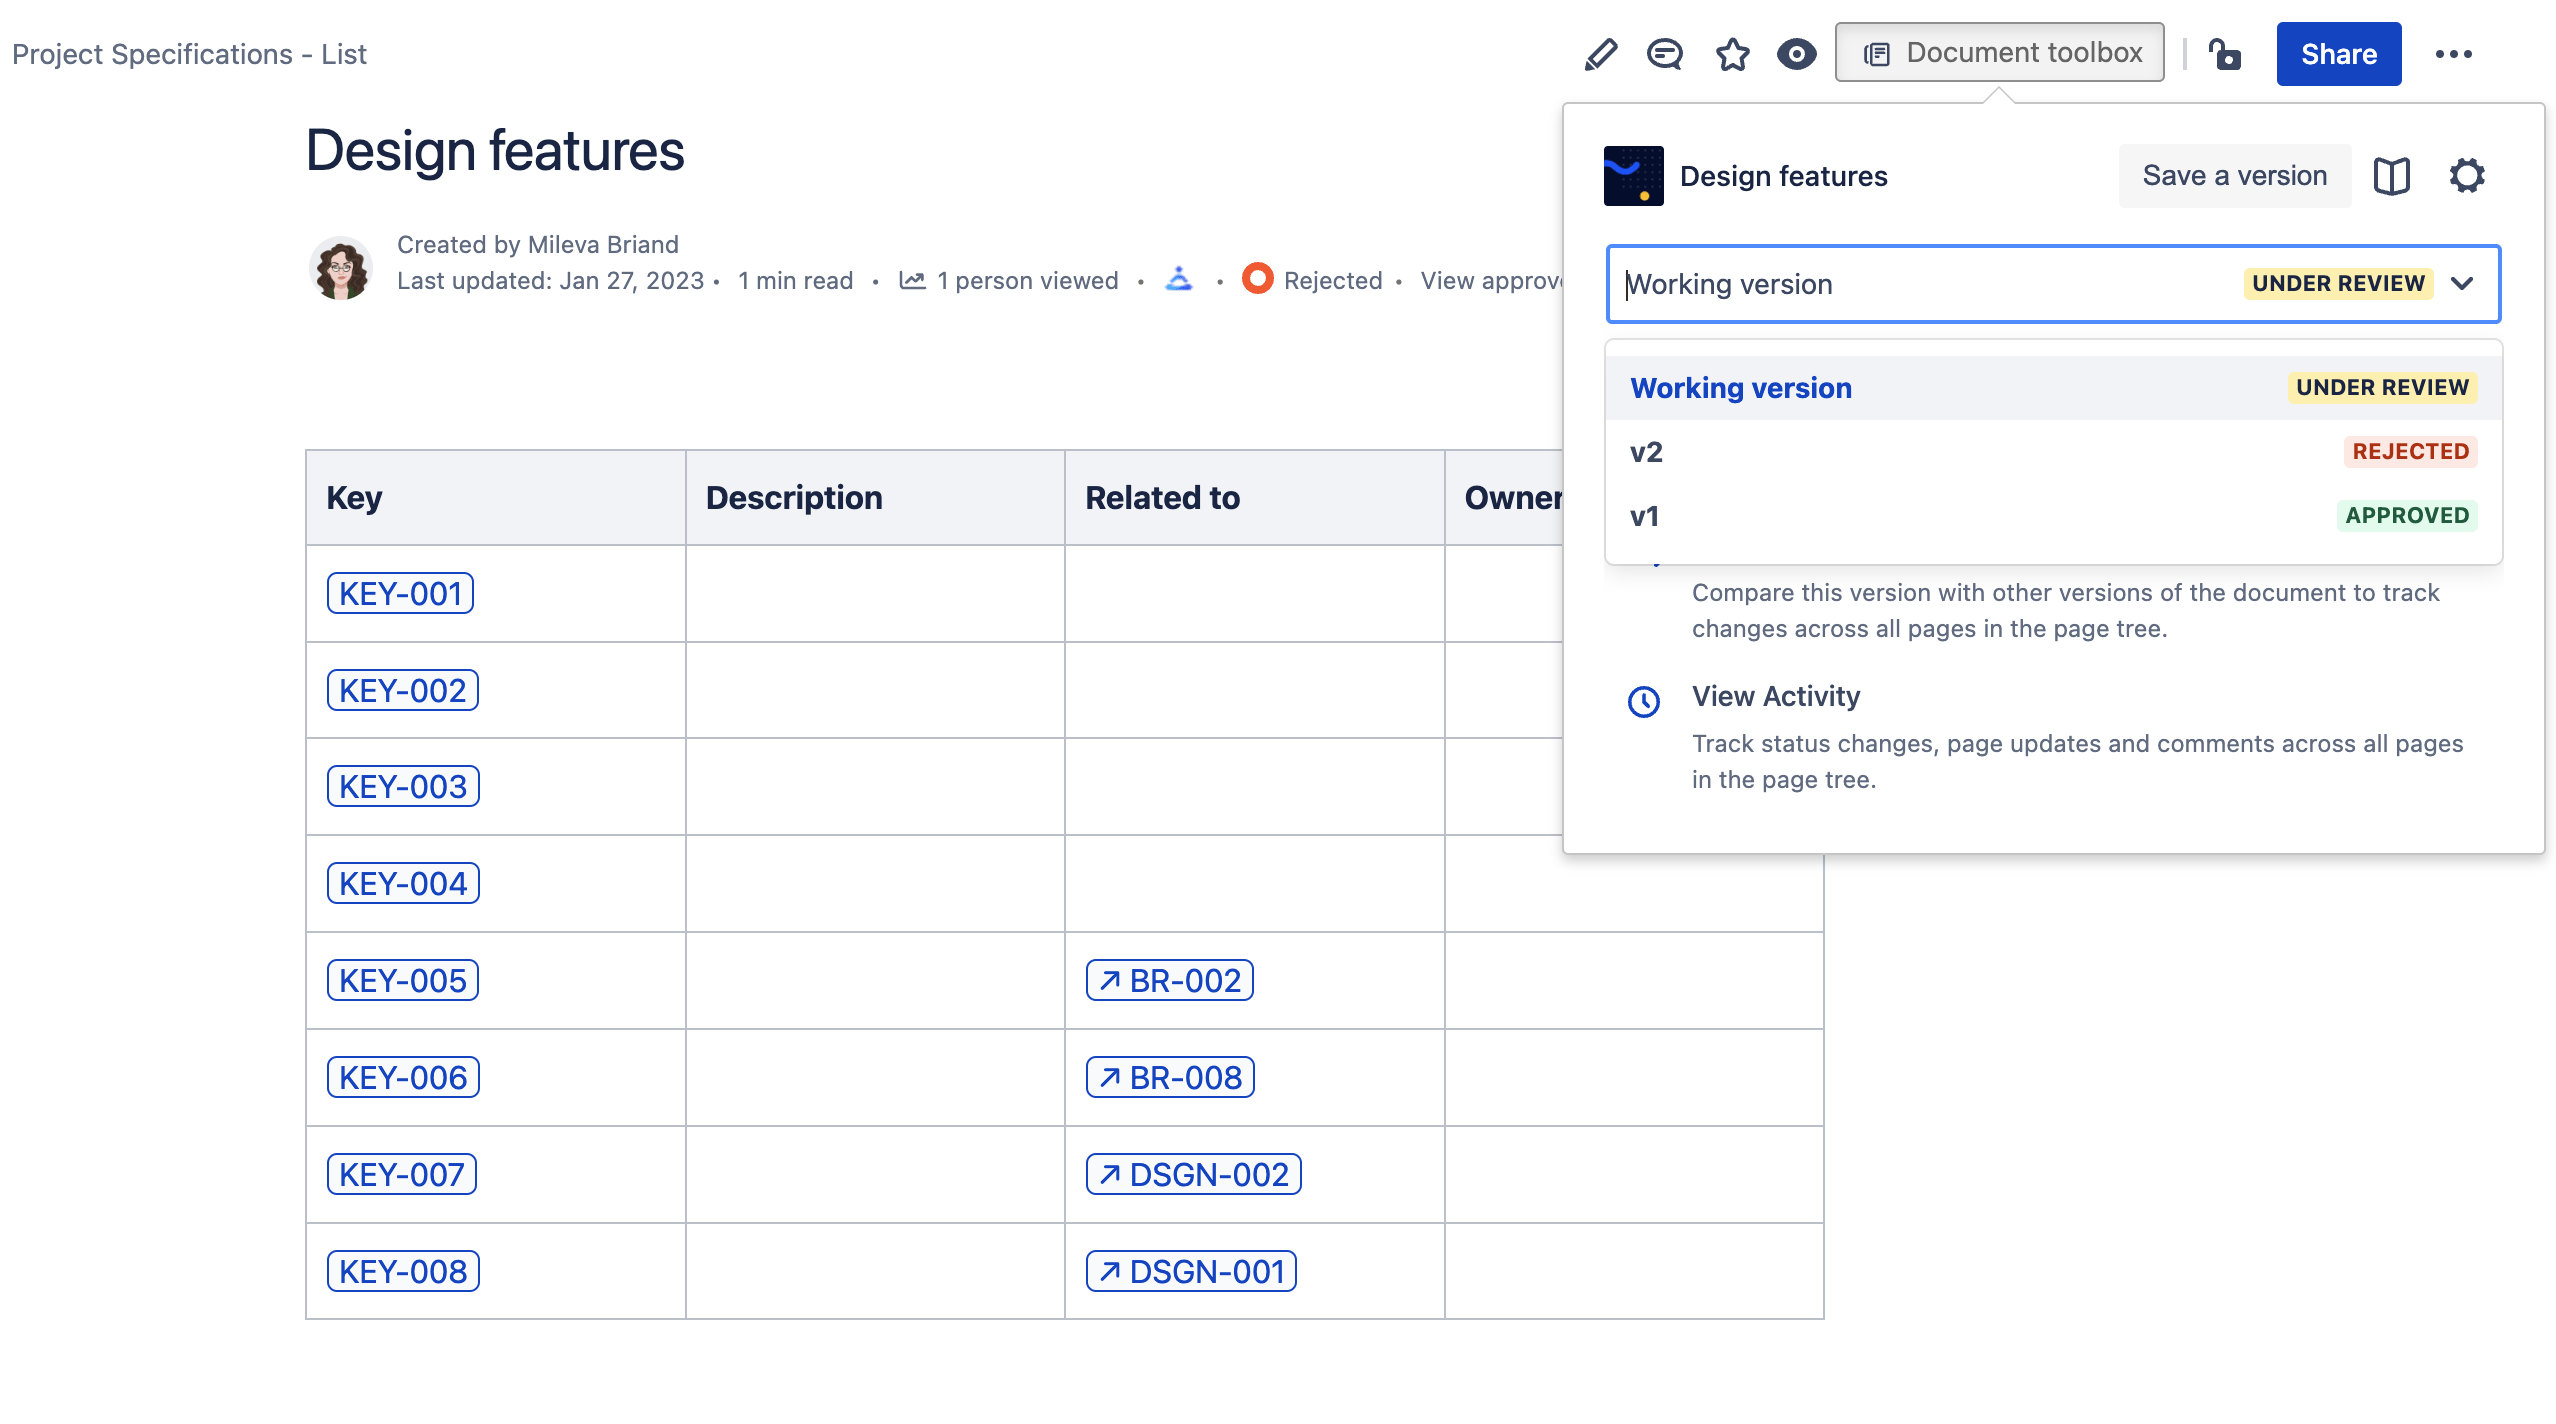
Here is what Scroll Documents looks like on the Cloud. As you can see, the user is selecting a status for a variant. It is also possible to restrict a variant and freeze it.
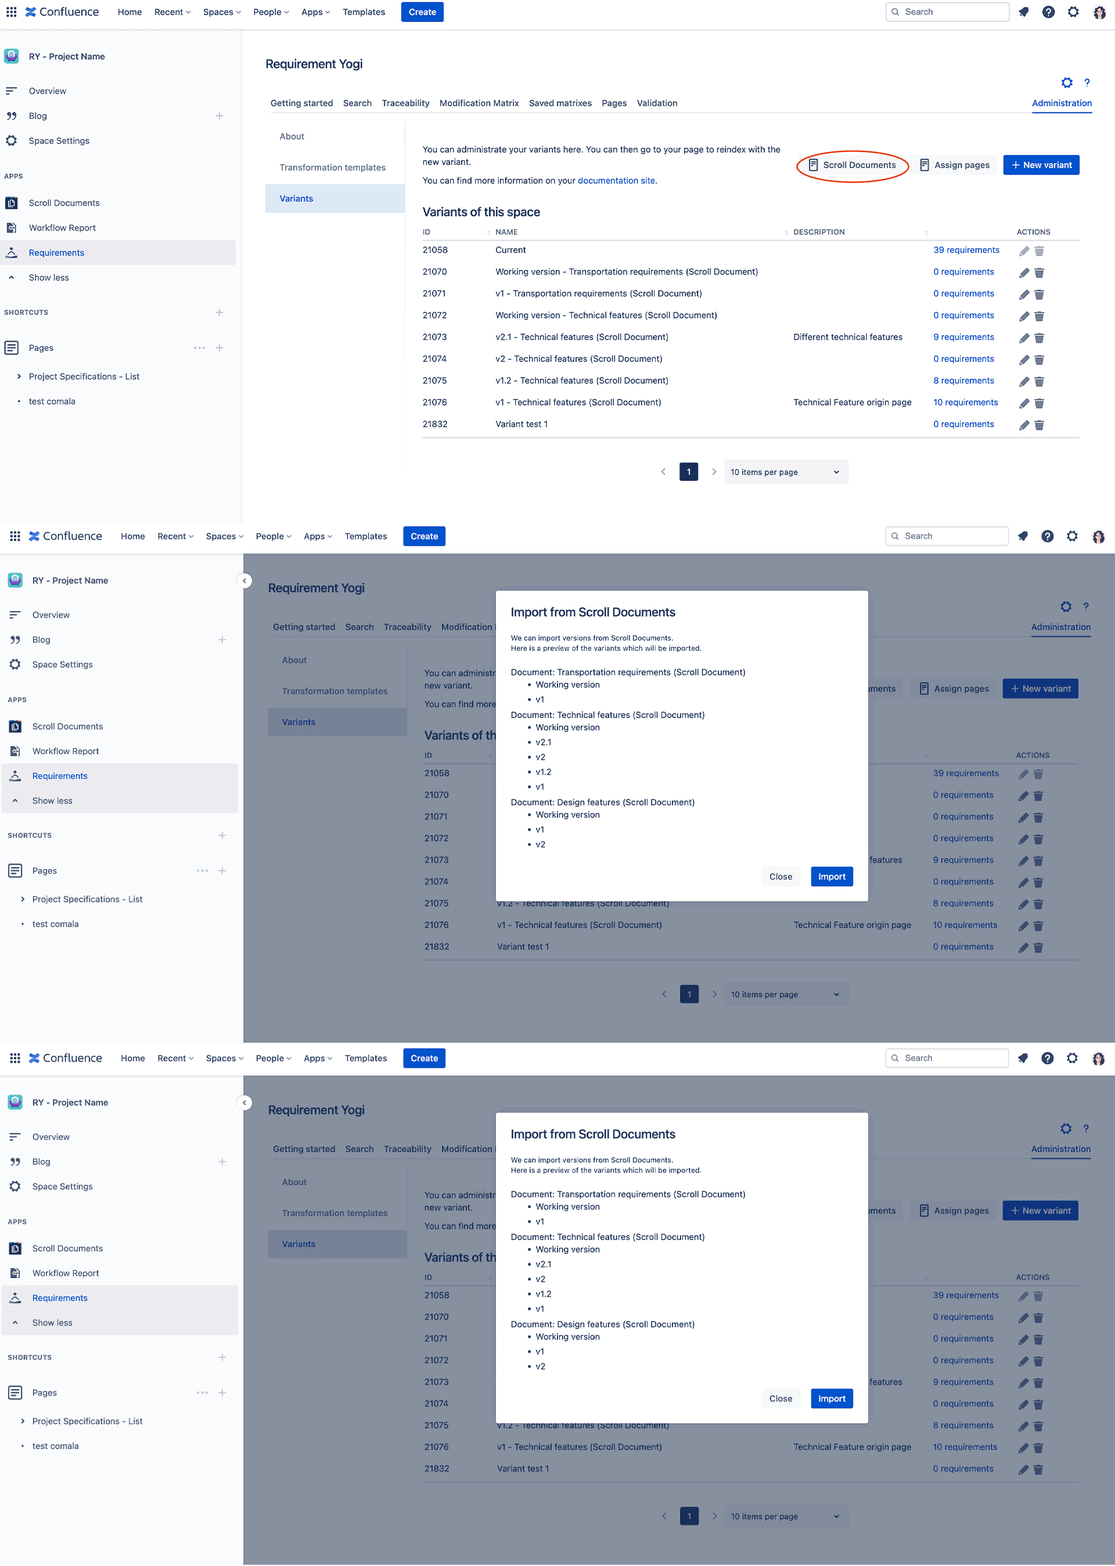
It is even possible to integrate those variants with Requirement Yogi. In the space administration of Requirement Yogi, go to the variants and click “Scroll Documents” (assuming both apps are present in your Cloud instance). Then each page must be assigned to its variant. Once done, requirements will be indexed each in their variant, which means “REQ-001” can exist in variant A and B, and you can use the modification matrix to see the differences.
Requirement approval is difficult
There are many tools because each company has its own way of working. Some prefer that the approval status is reset each time a page modification is made, some others work for several weeks to monitor the differences between two variants and to approve a requirement. We’ve introduced to you 3 ways of solving this approval, with or without Requirement Yogi:
- Creating a customized workflow in Comala Documents to represent the approval of requirements,
- Approving each requirement individually using an inline or external property within Requirement Yogi,
- Using Scroll Documents to manage several variants in parallel, which can behave as different branches.
These tools will simplify your document management and the communication between all the people involved in the project.


